Prerequisites
Opting in to AWS Compute Optimizer
To opt in to Compute Optimizer-
Open the Compute Optimizer console at https://console.aws.amazon.com/compute-optimizer/
If this is your first time using the Compute Optimizer console, the Compute Optimizer landing page is displayed. - Choose Get started.
- On the Account setup page, review the Getting started and Setting up your account sections.
- The following options are displayed if the account that you’re signed in to is the management account of your organization. Choose one before continuing to the next step.
- Only this account - Choose this option to opt in only the account that you’re currently signed in to. If you choose this option, Compute Optimizer analyzes resources that are in the individual account, and generates optimization recommendations for those resources.
- All accounts within this organization - Choose this option to opt in the account you’re currently signed in to, and all of its member accounts. If you choose this option, Compute Optimizer analyzes resources that are in all accounts in the organization, and generates optimization recommendations for those resources.
- Choose Opt in. By opting in, you indicate that you agree to and understand the requirements to opt in to Compute Optimizer.
- After you opt in, you’re redirected to the dashboard in the Compute Optimizer console. At the same time, the service immediately starts analyzing the configuration and utilization metrics of your AWS resources. For more information, see Metrics analyzed by AWS Compute Optimizer
If you add any new member accounts to your organization after you opt in, Compute Optimizer automatically opts in those accounts.
Enabling Resource Costs
To enable Wiv to extract resource costs accurately, please enable resource-level data tracking at daily granularity by following these steps:- Navigate to Cost Management Preferences
- Select the Cost Explorer Tab
- Enable the “Resource-level data at daily granularity” option
- Select “All Services” (Note: This feature is available at no additional cost)
- Click “Save Preferences” to apply your changes
Activate trusted access for stack sets with AWS Organizations


Wiv On Boarding Process - Payer
Description
Onboarding Process Overview
Welcome to the initial setup guide. This document outlines the necessary steps to integrate your AWS Account with our FinOps automation platform, thereby enhancing your financial operations through effective resource management.Step 1: Establishing Connection with Org/Payer Account
To initiate, connect your Org/Payer account. This primary account holds exclusive information crucial for comprehensive cost and usage analysis. Our system leverages this data to facilitate robust financial optimization strategies.Step 2: Configuration of Cost & Usage Report
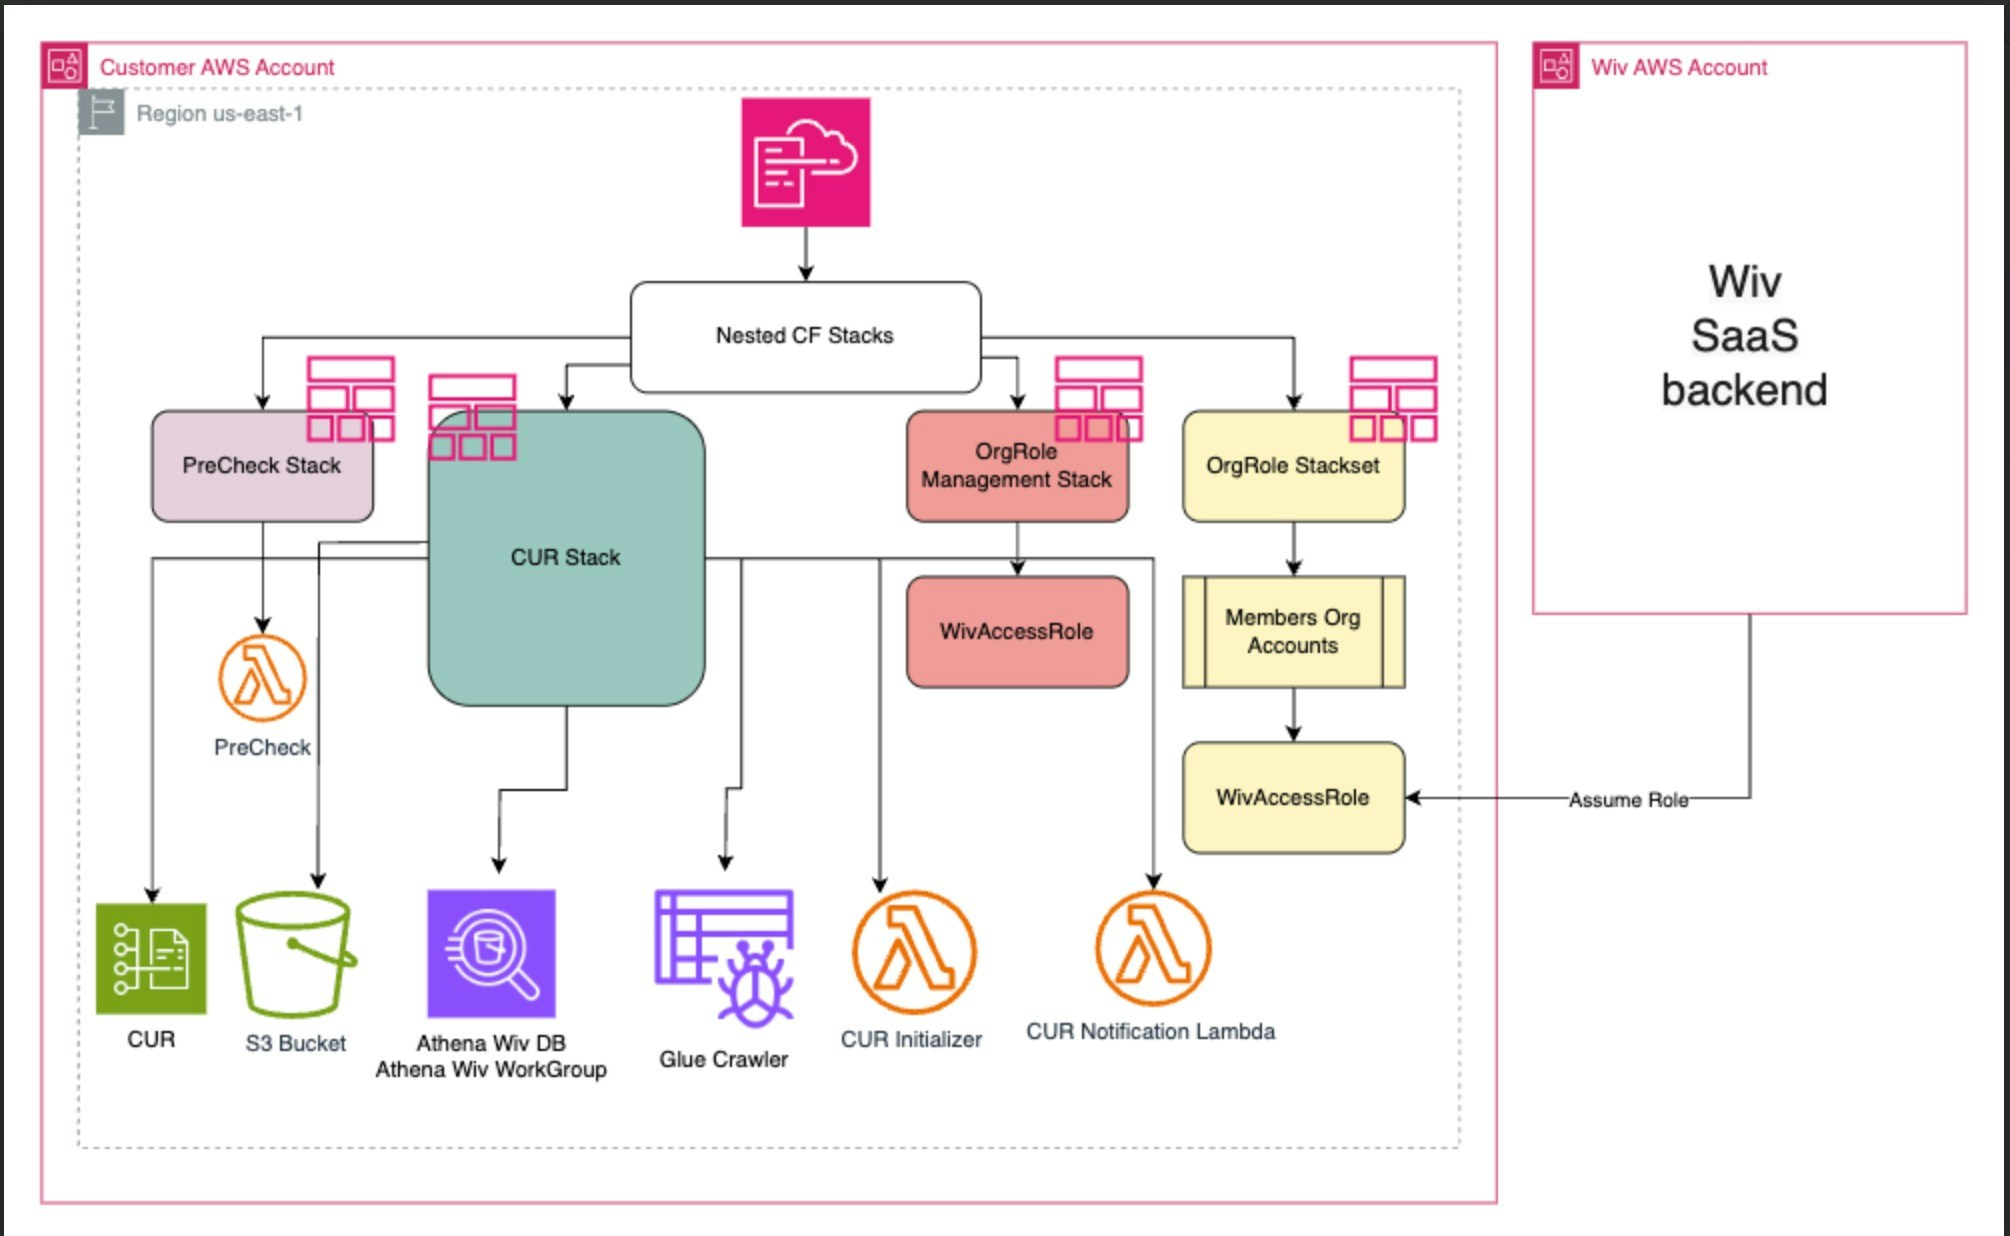
We facilitate a detailed Cost & Usage Report (CUR) specific to your AWS environment. This report is pivotal in identifying unnecessary expenditures and uncovering potential savings. It includes:Step 3: Secure Access Configuration
For enhanced security, an IAM Role with an external ID is created at the payer level. This role is pivotal in establishing a secure connection to your AWS account, safeguarding your data and operations.Step 4: Deployment of ‘WivAccessRole’
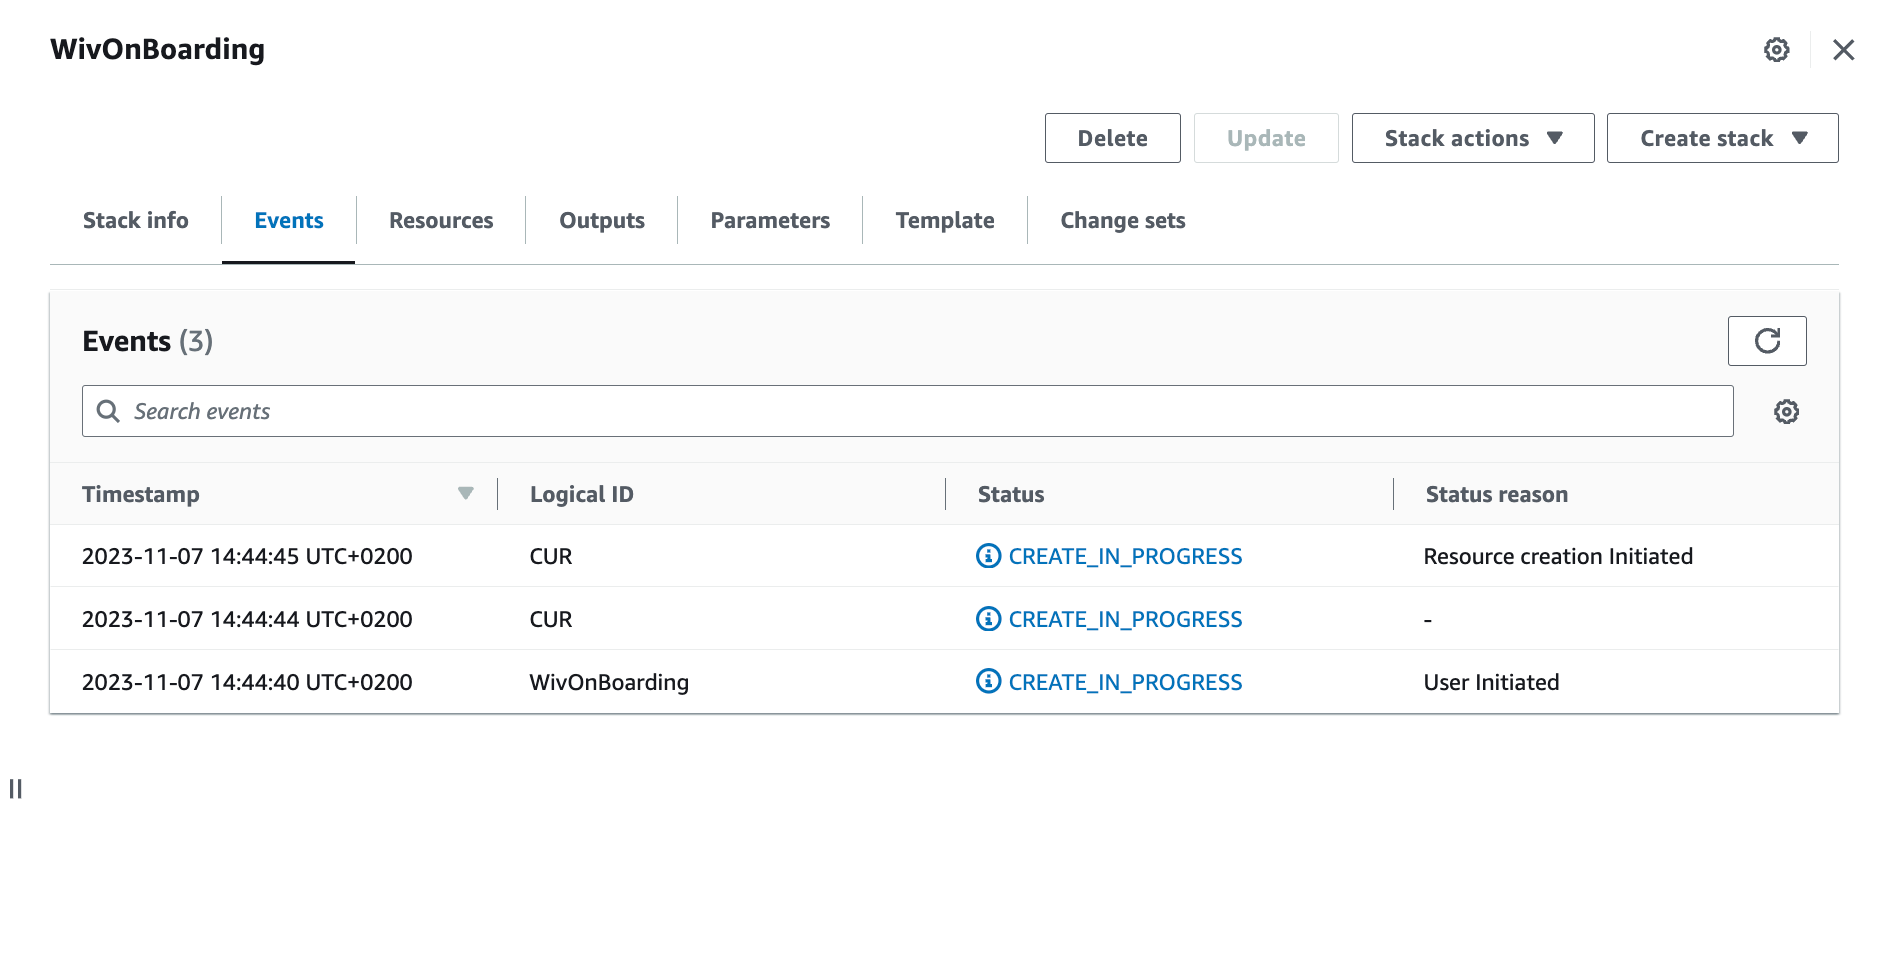
Upon successful connection with the payer account, deploy the ‘WivAccessRole’. This IAM role is instrumental in extending optimization capabilities to all linked accounts. The deployment is designed to be user-friendly and can be completed swiftly as per the instructions provided.For fully automated onboarding process
open your AWS payer account in a new tab
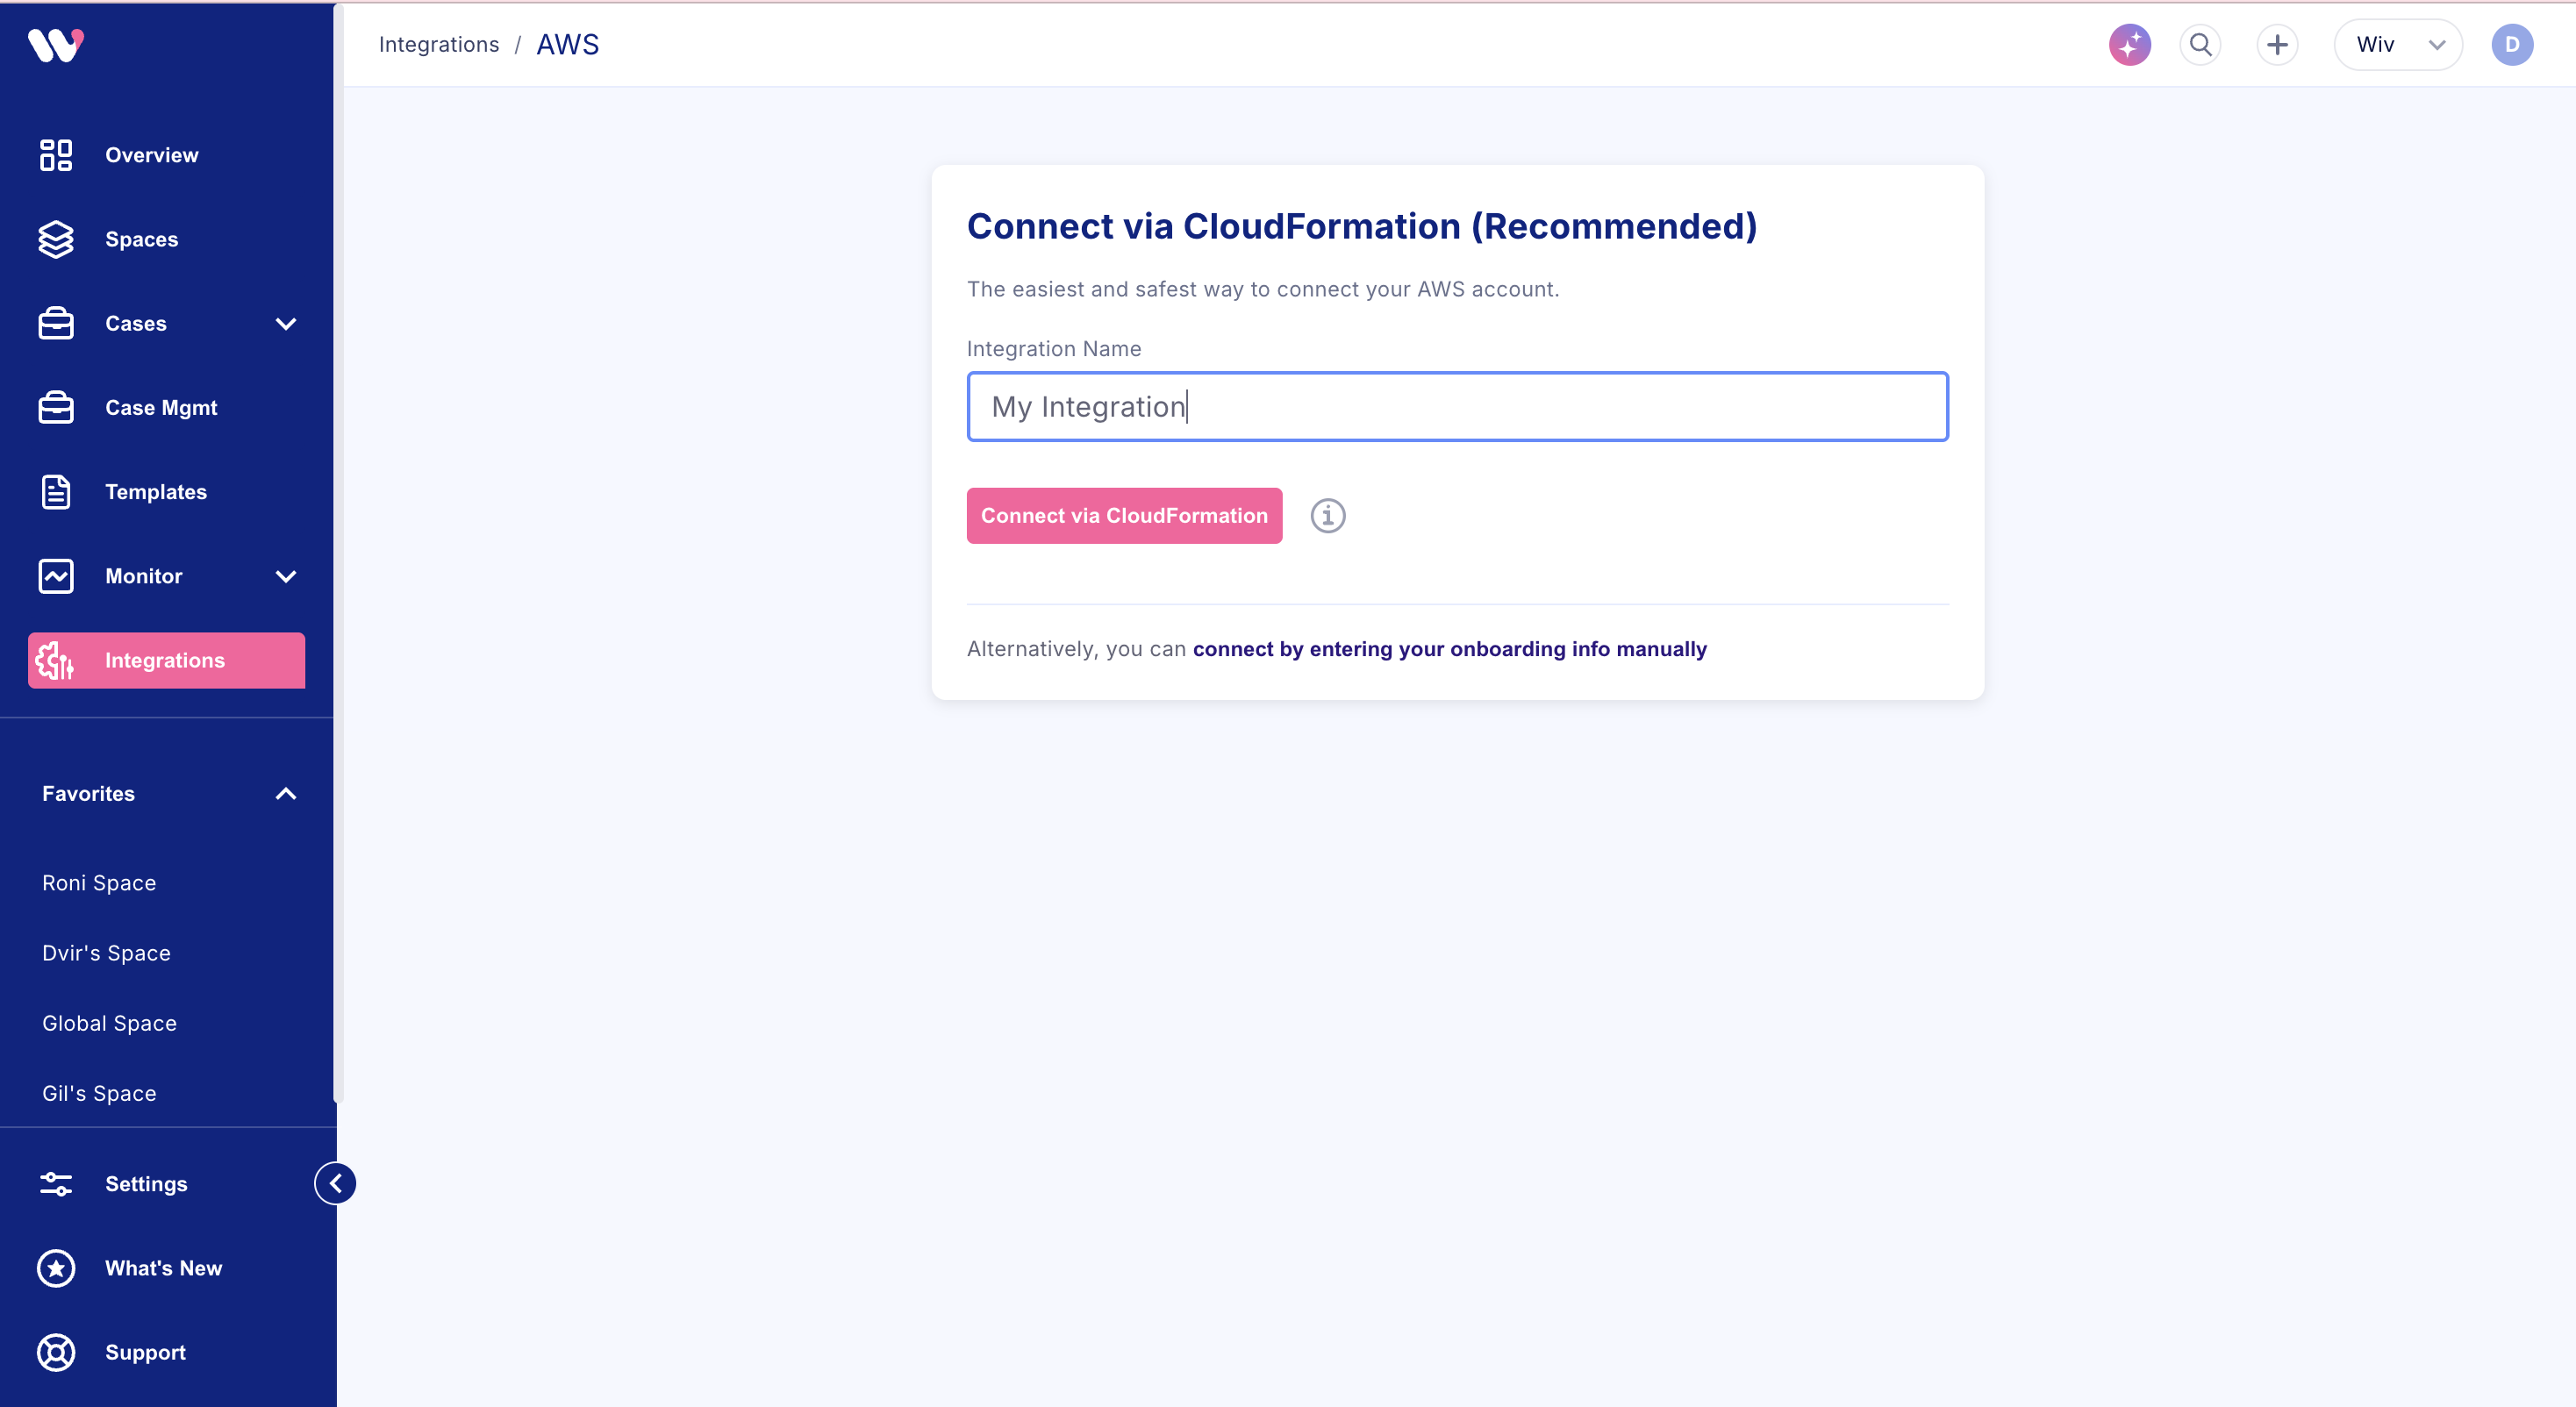
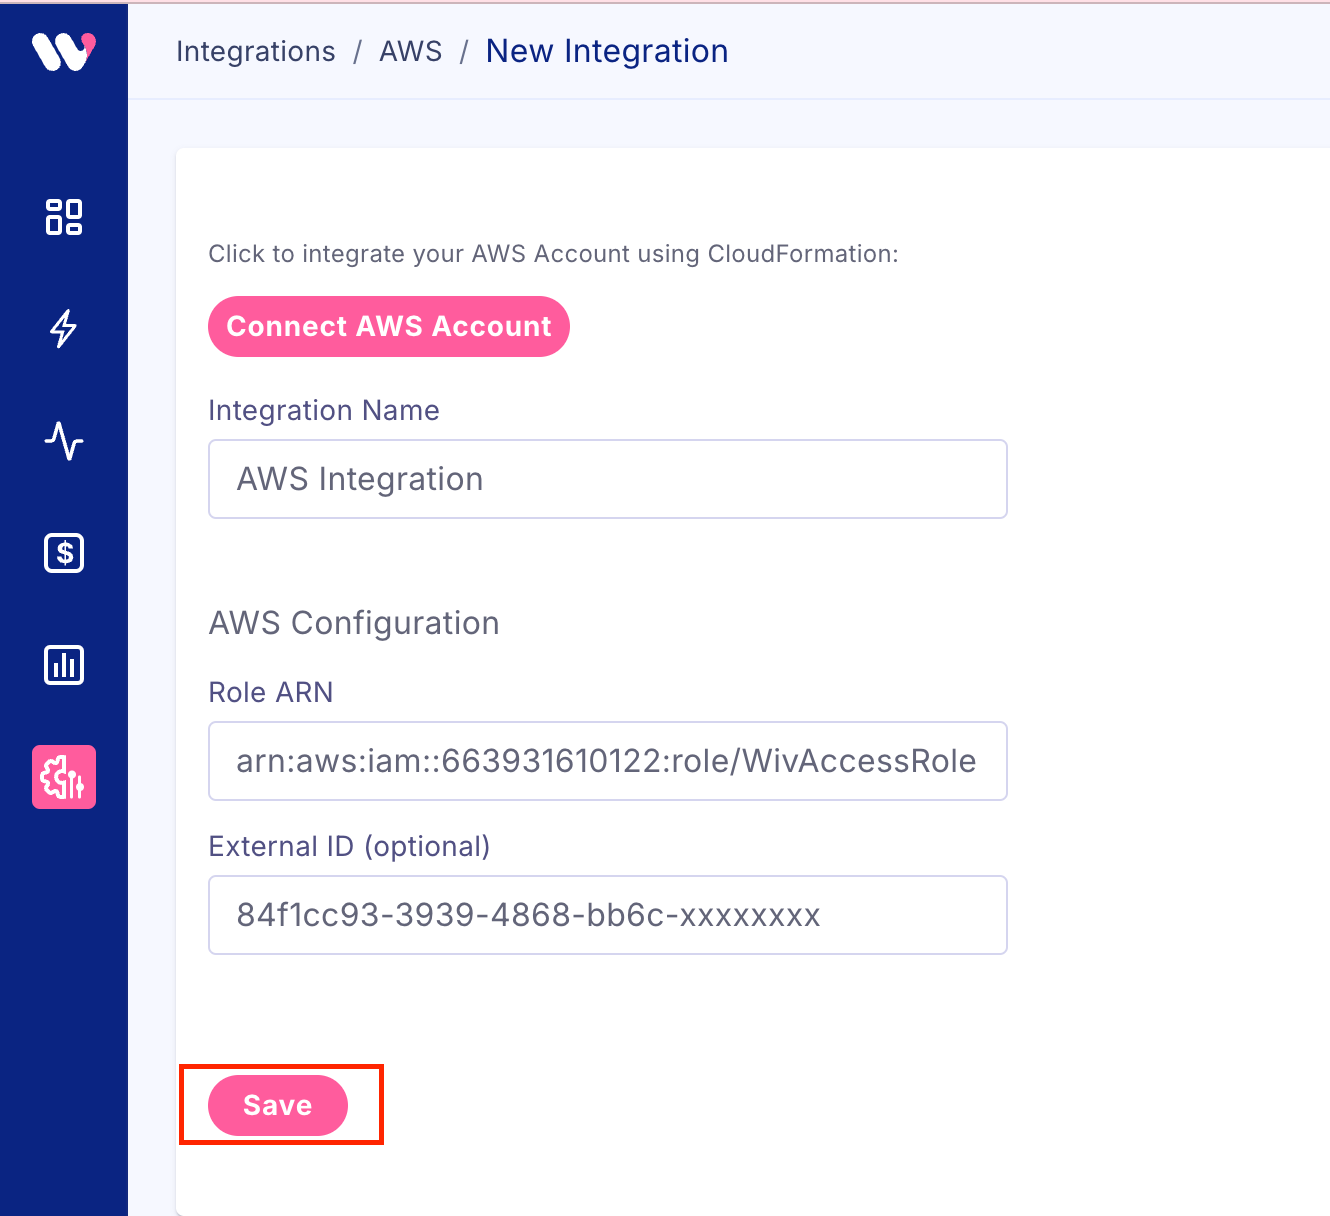
from Wiv console go to Integrations->AWS->New aws integration
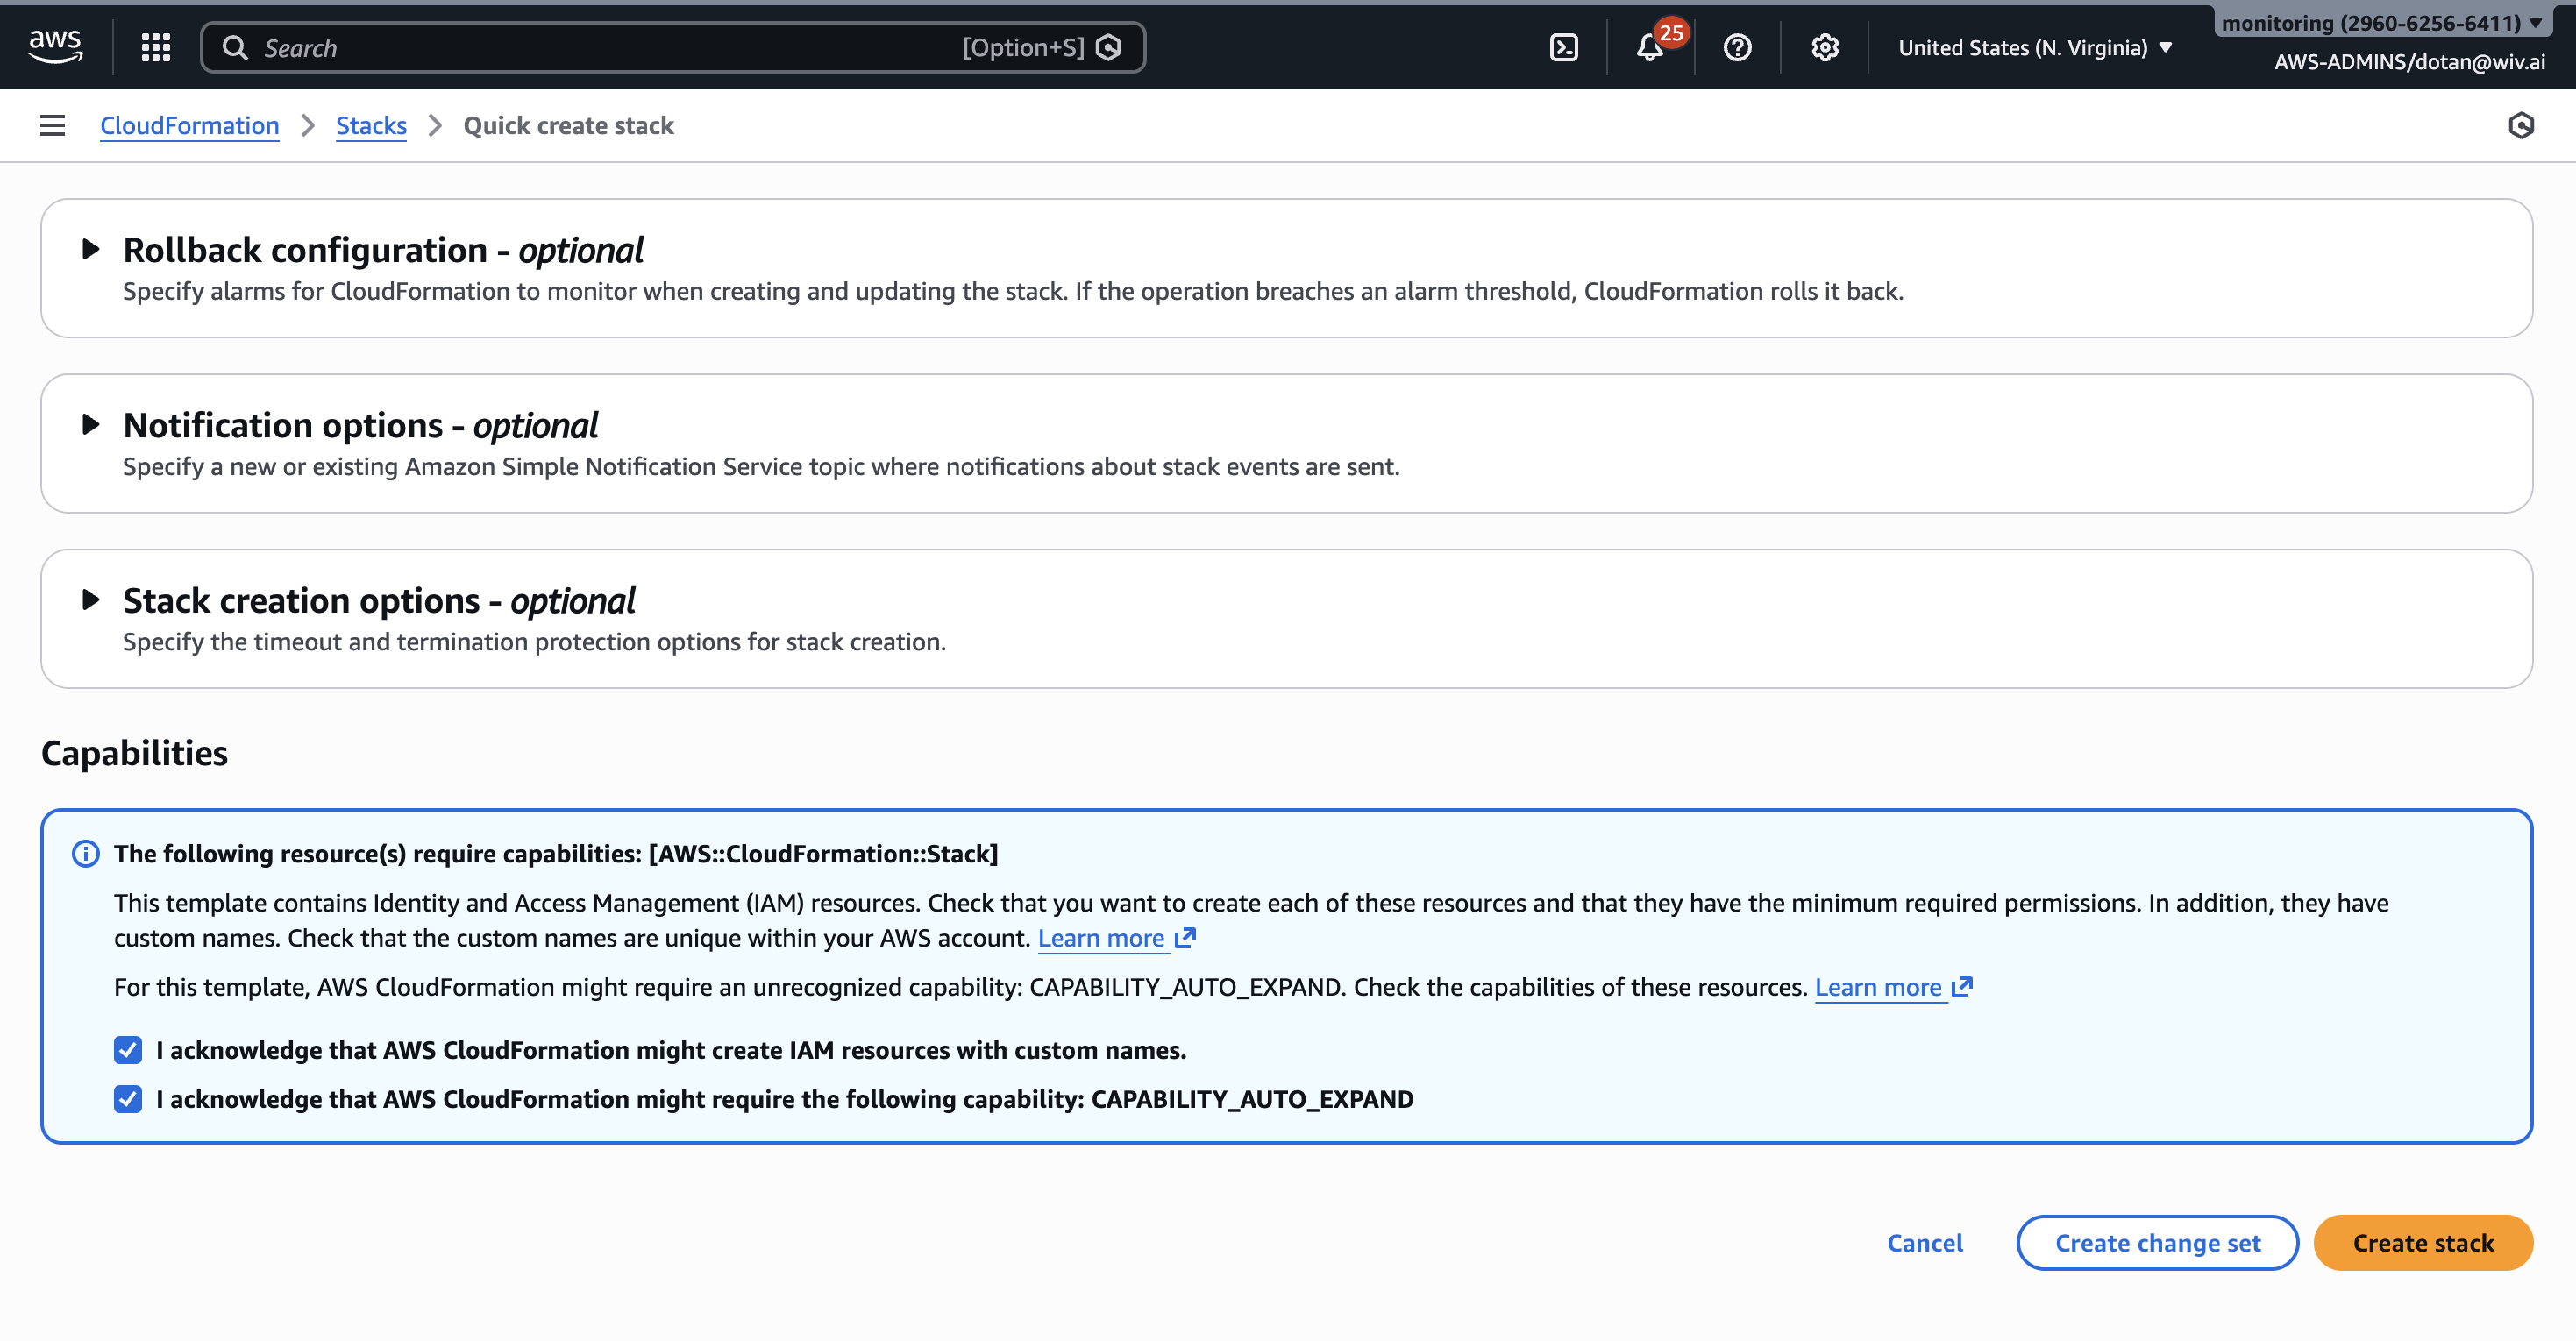
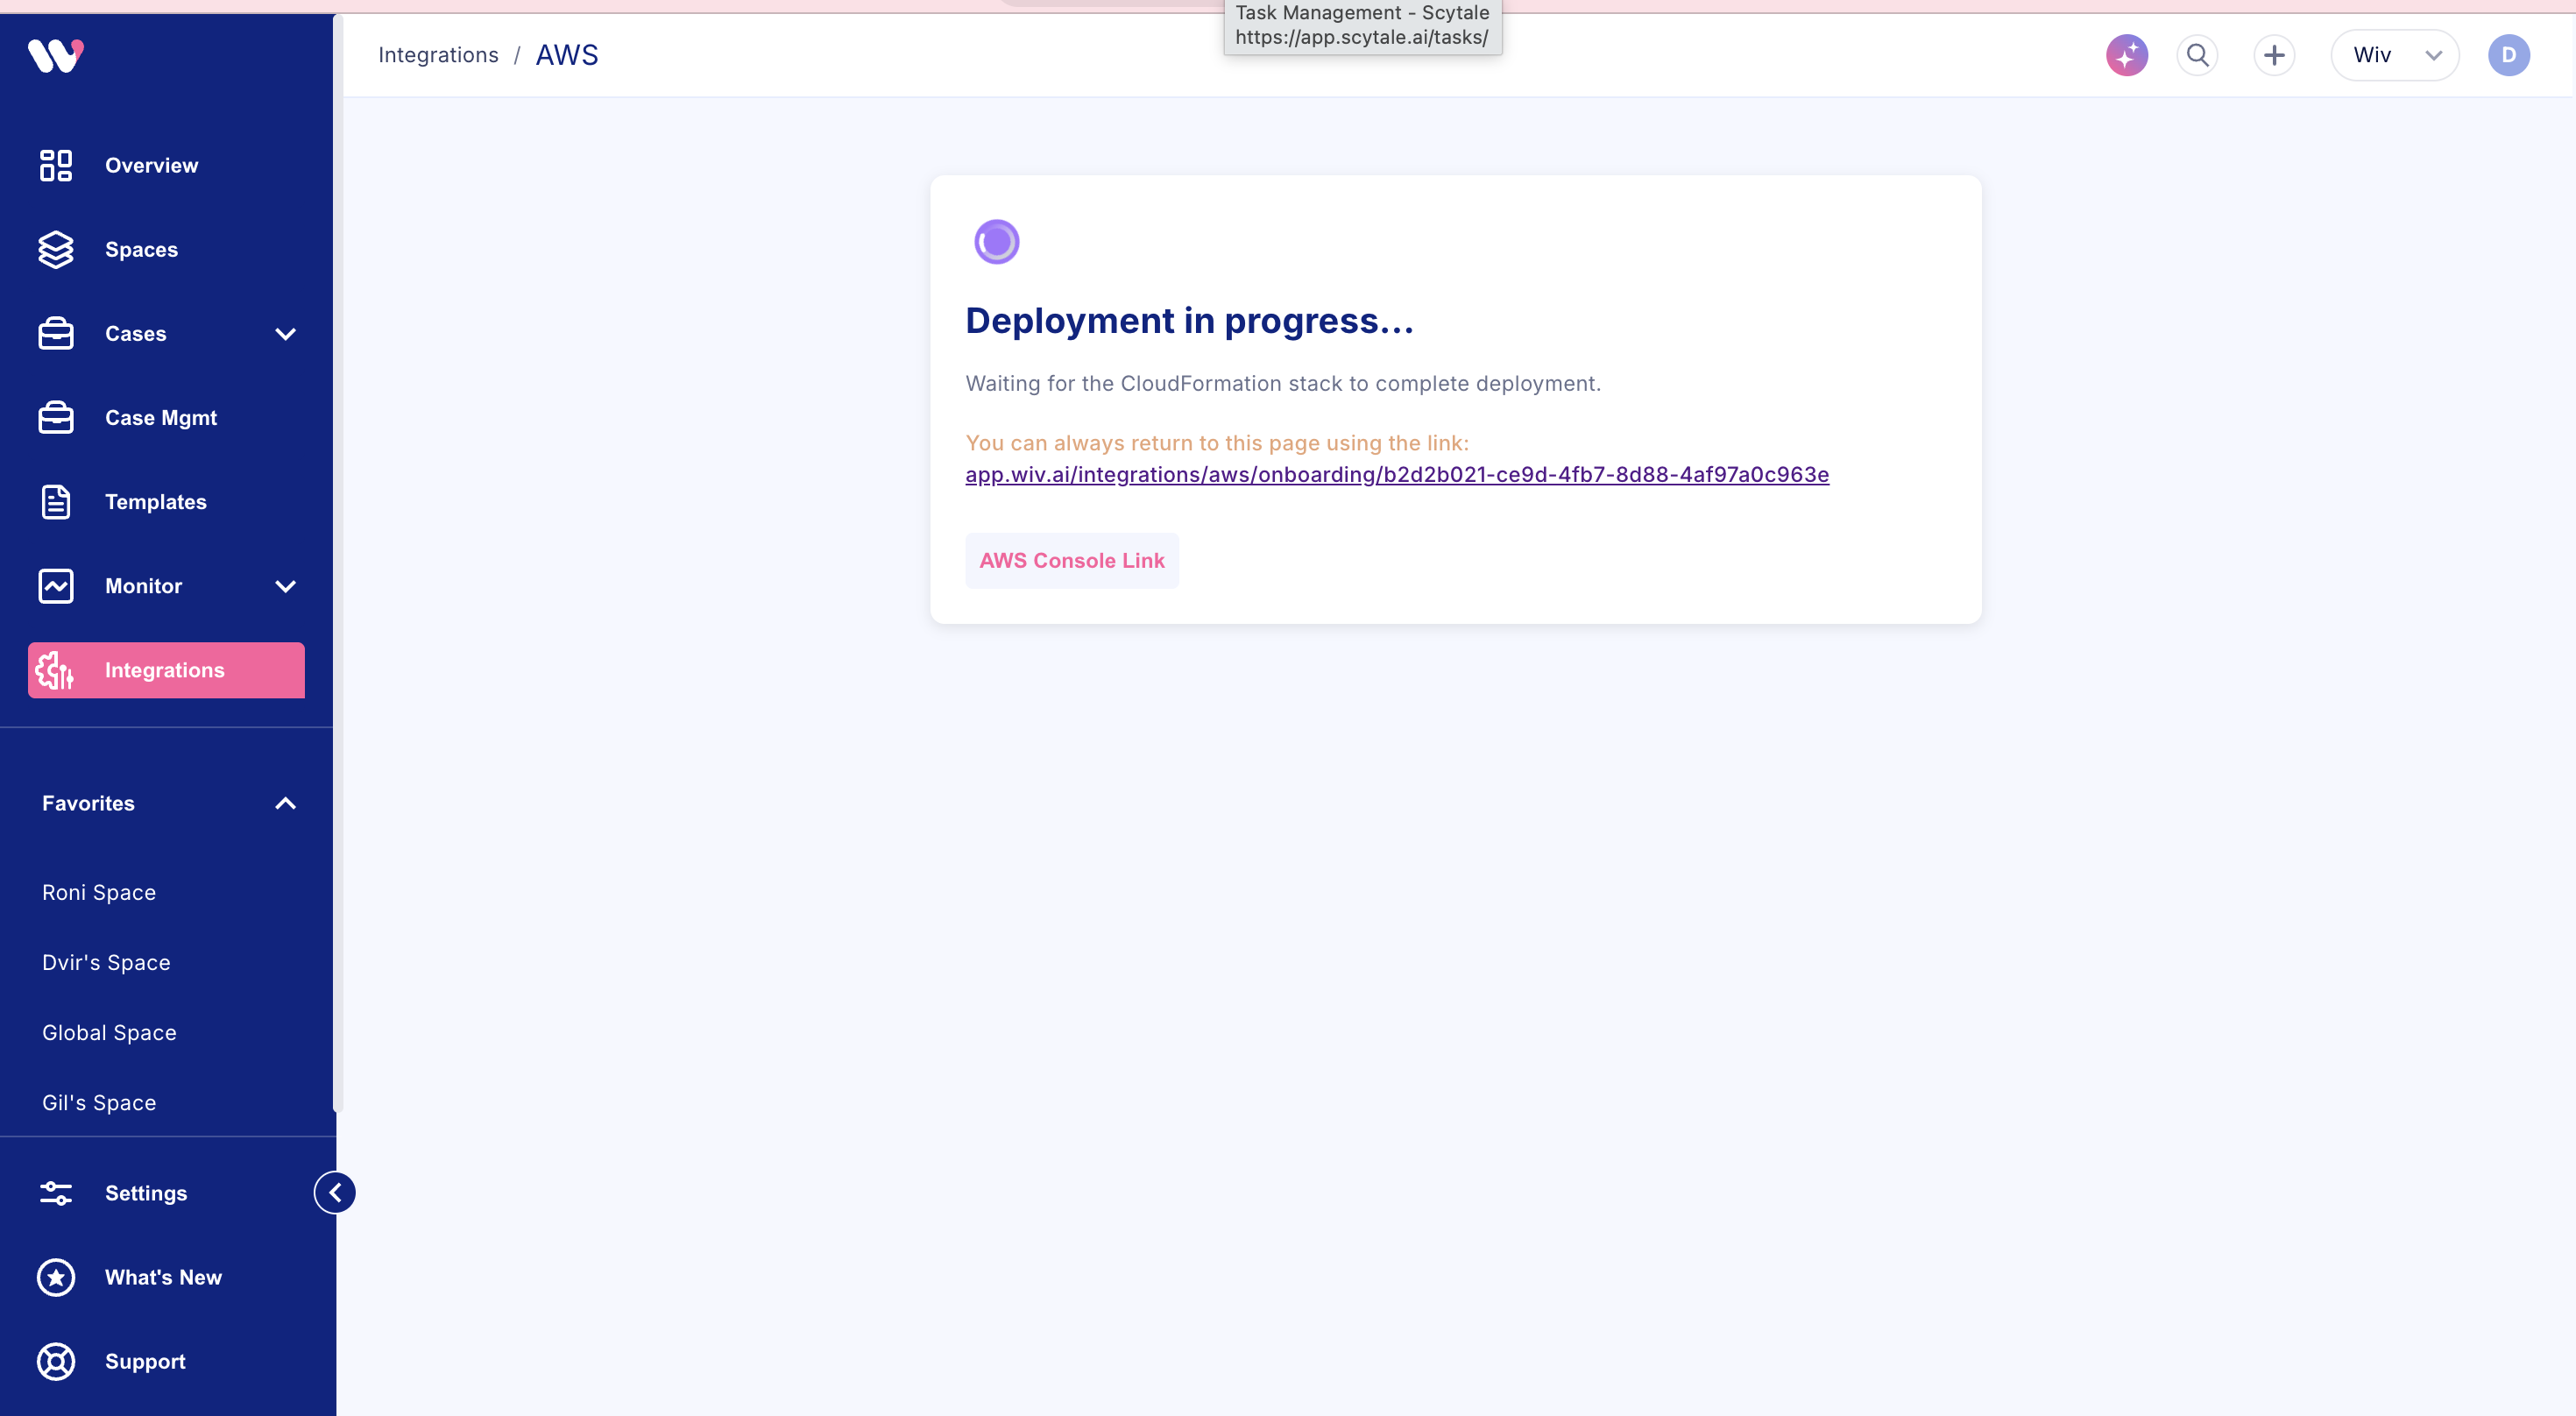
add integration name and click “Connect via CloudFormation”
**
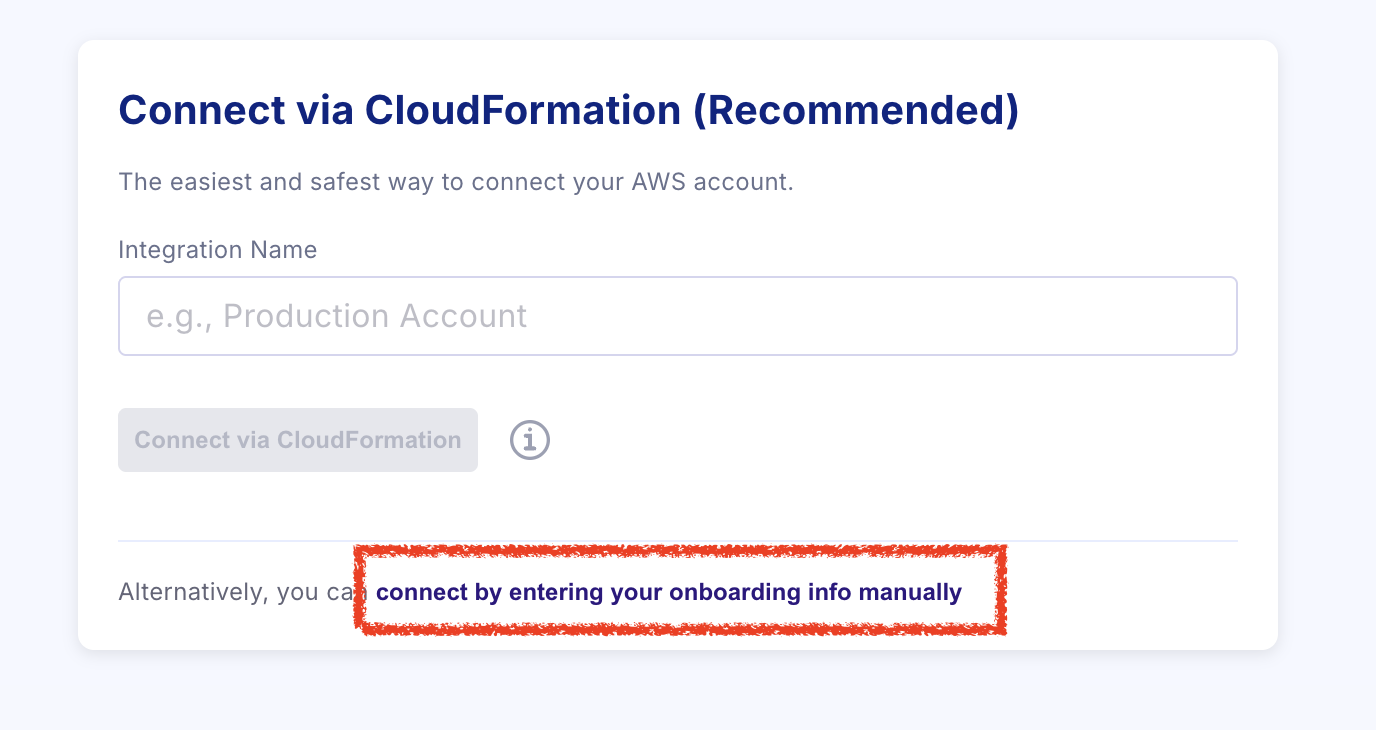
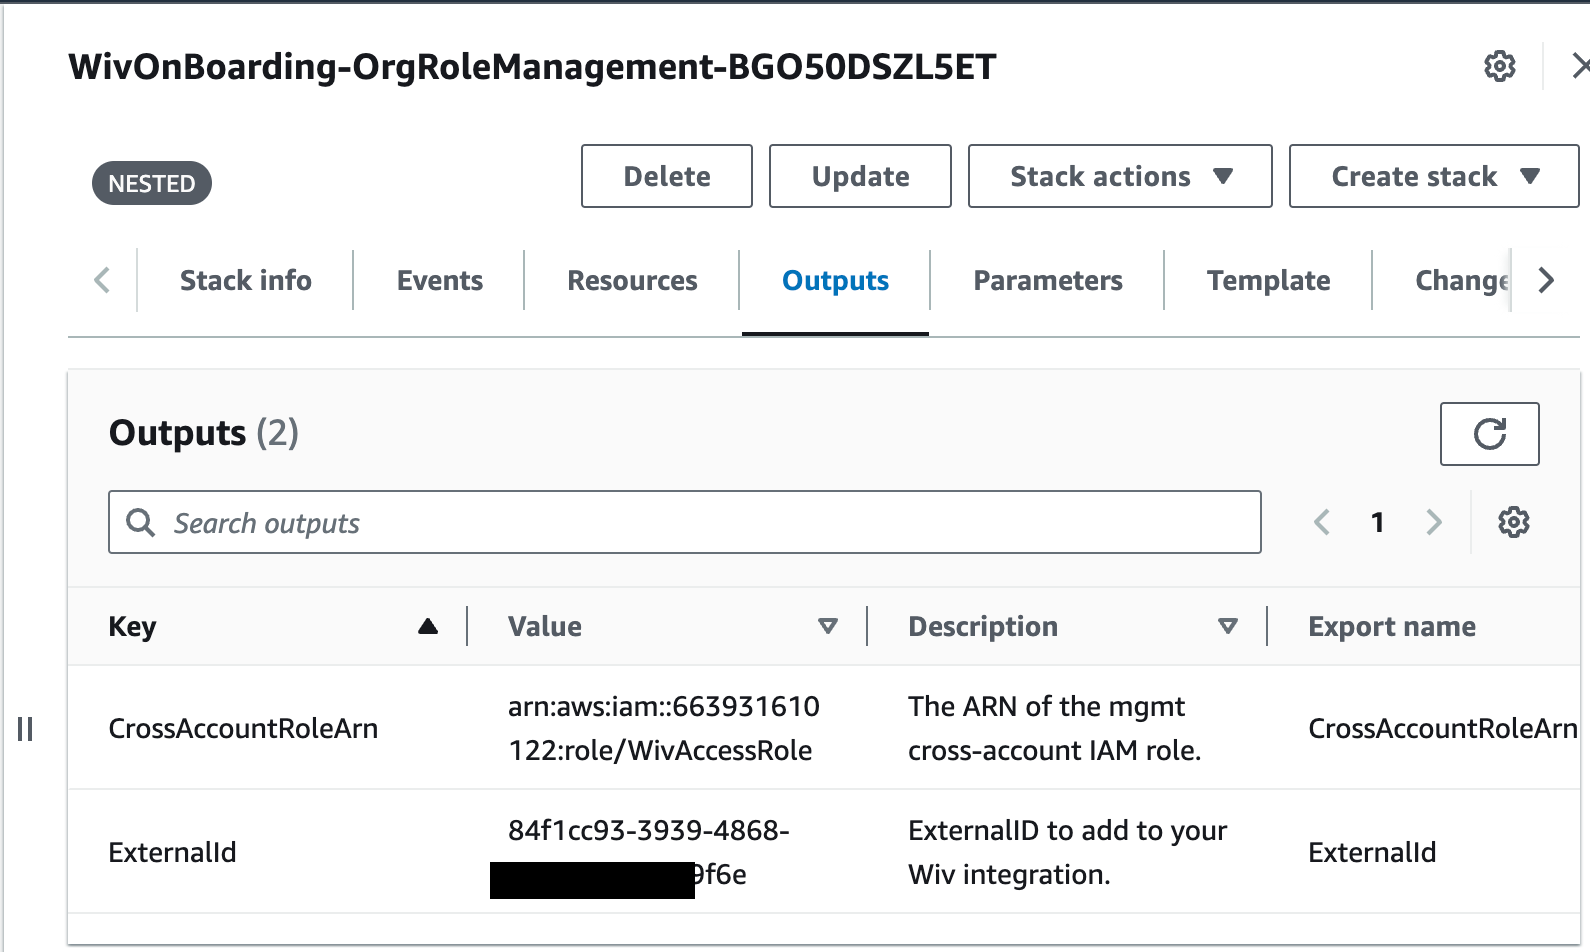
For manual onboarding, please click on the ‘connect by entering your onboarding info manually’
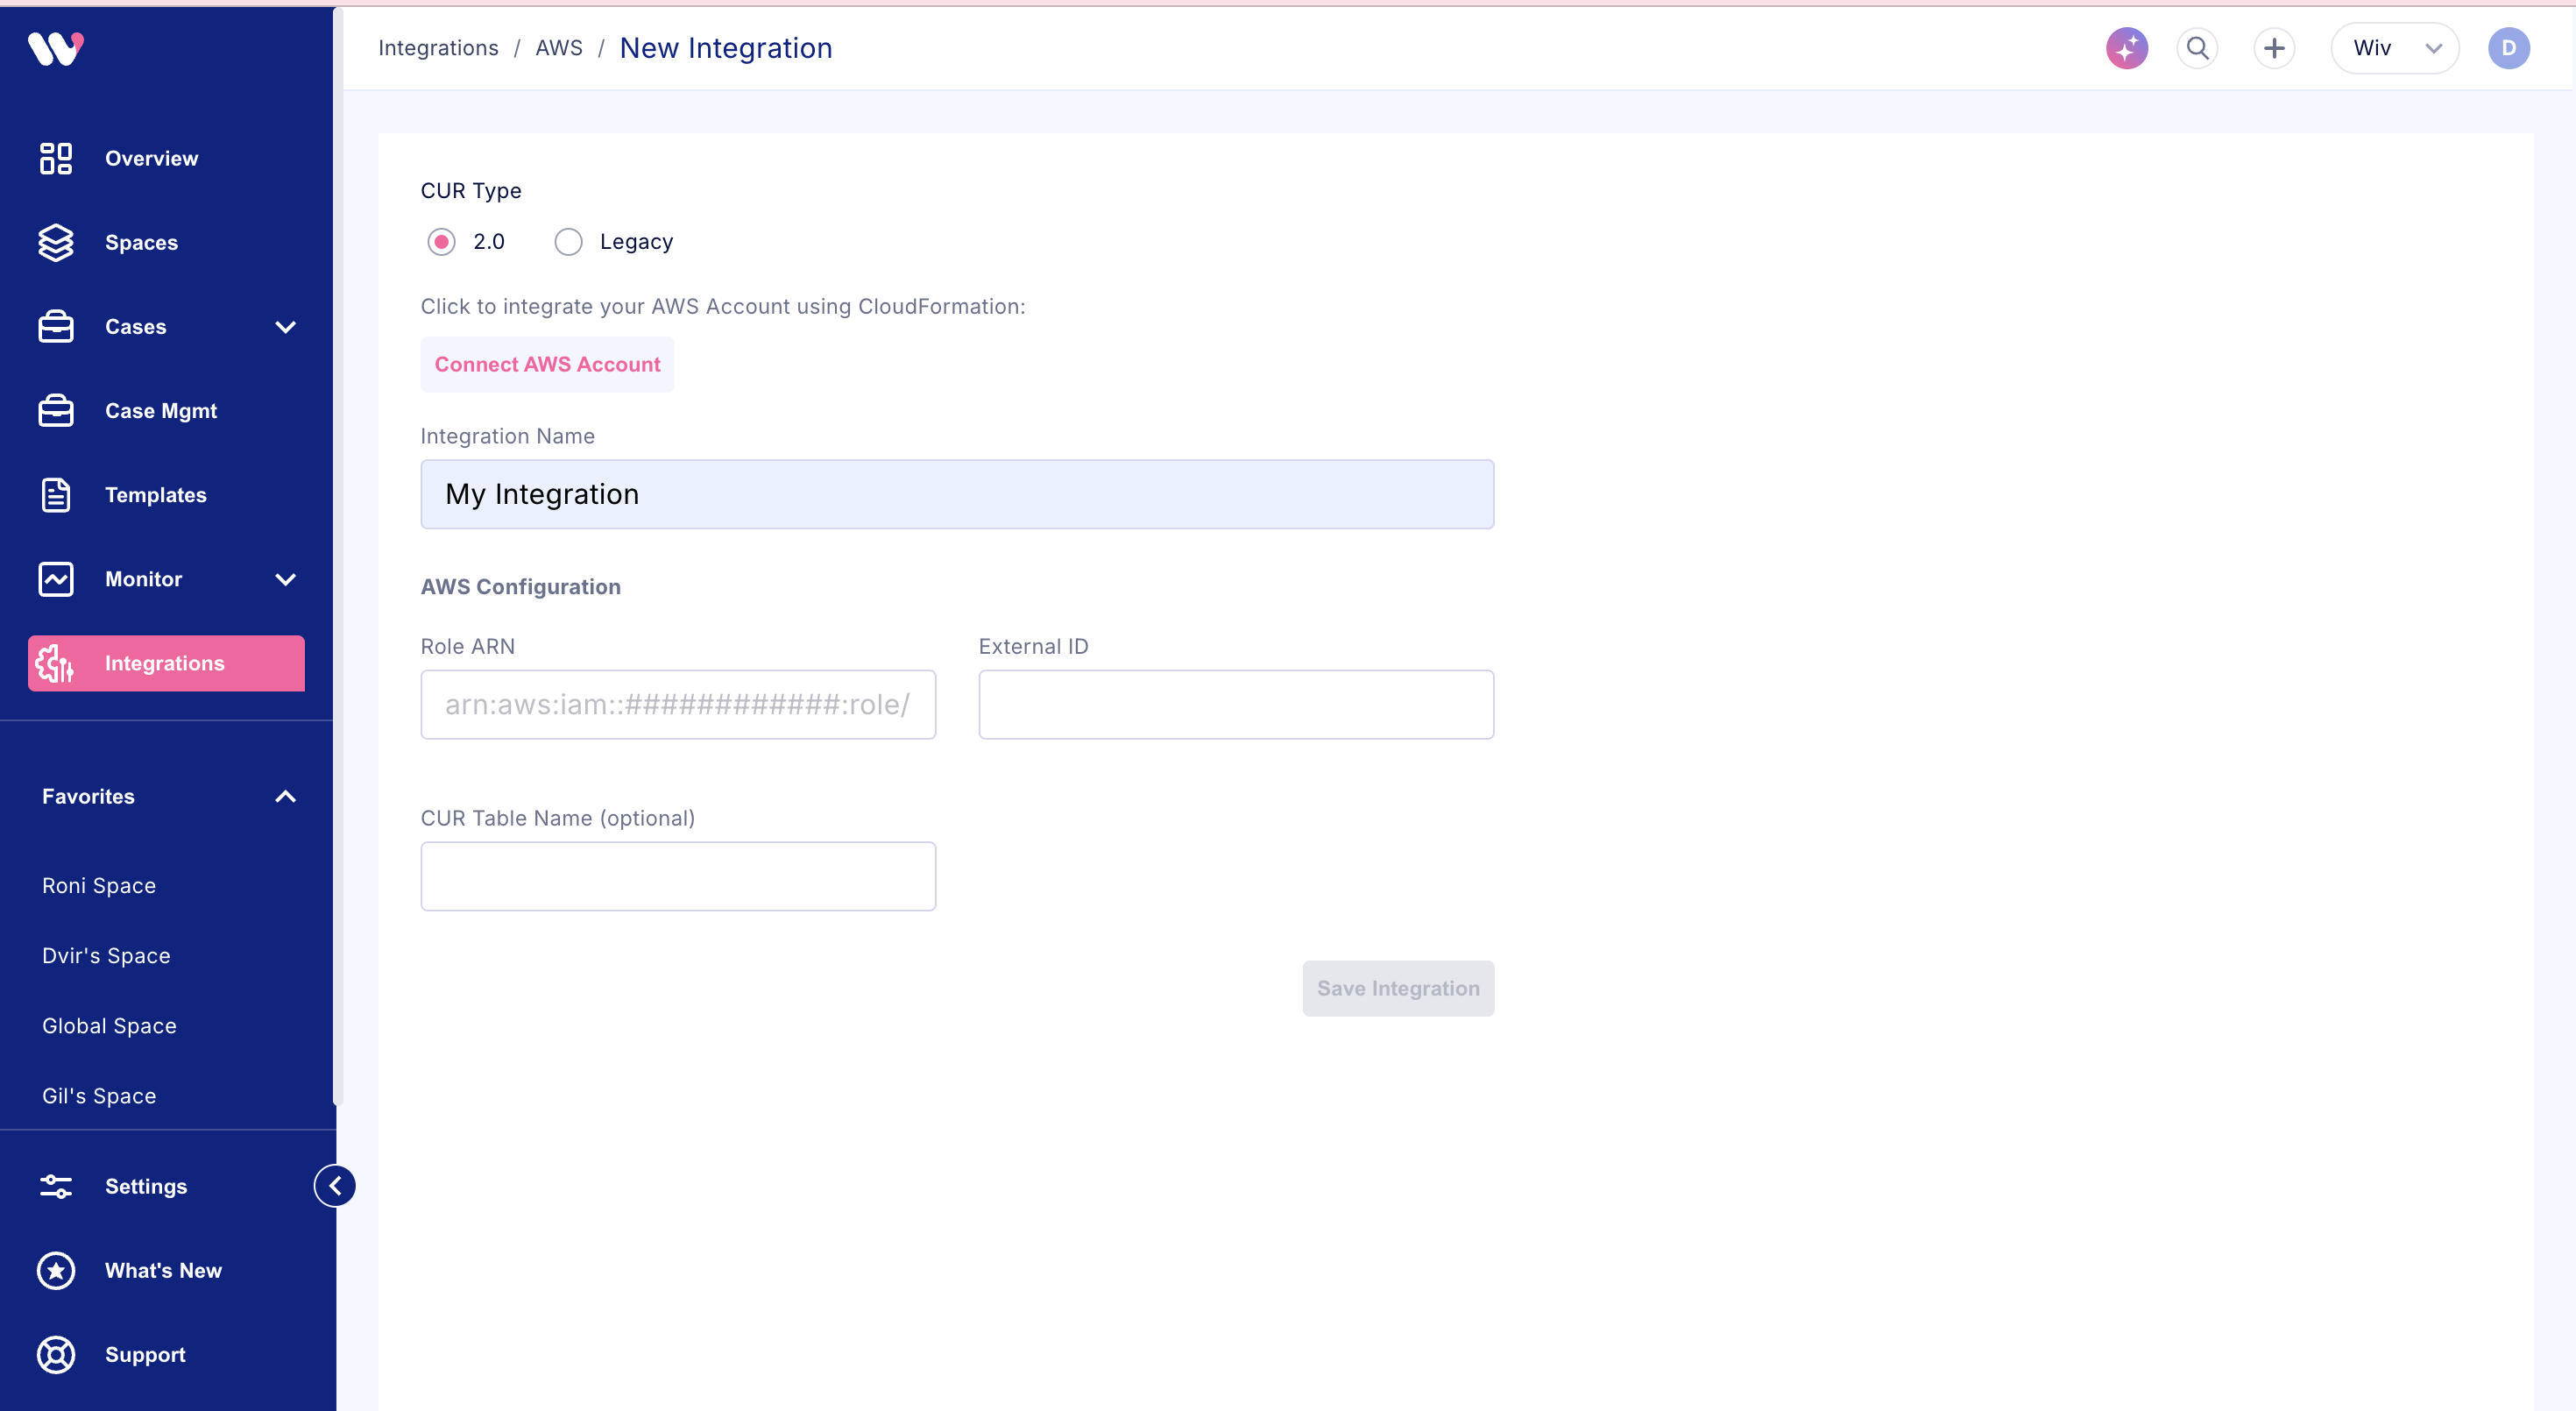
”Role ARN” and “External id” from the nested stack “WivOnBoarding-OrgRoleManagement-XXXXXXXXXXXX”
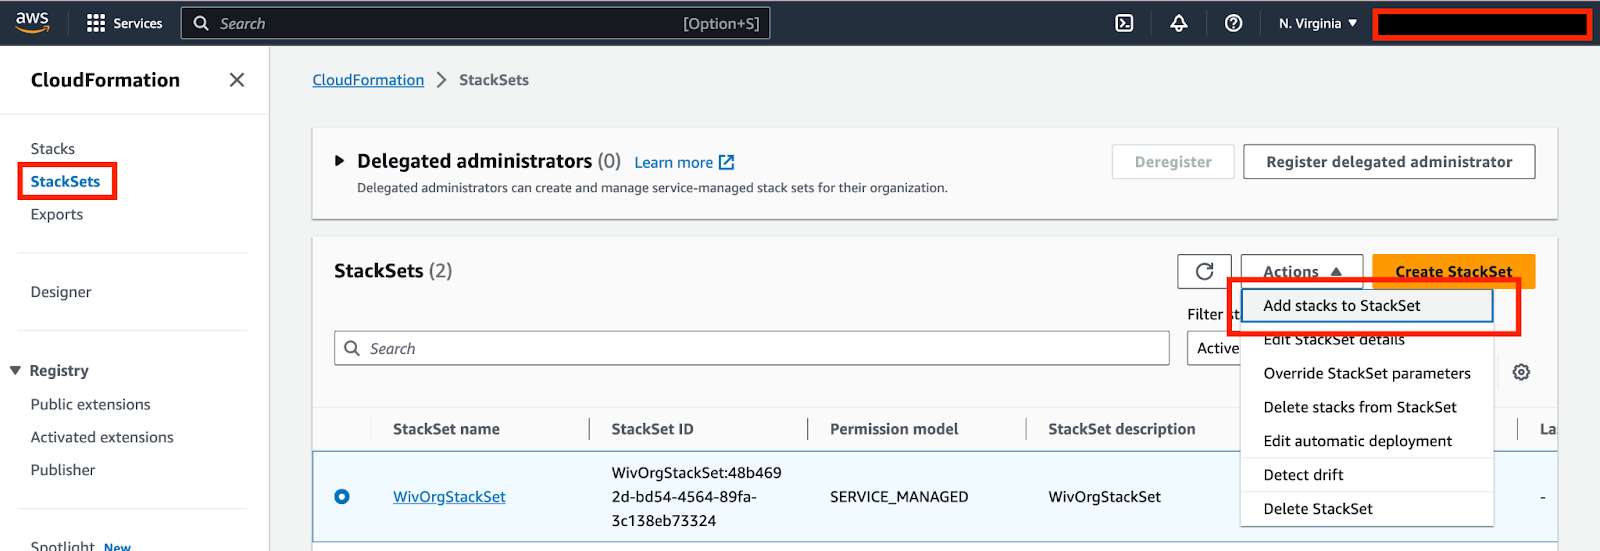
Adding AWS Organization Units/Linked Accounts to the Stackset
Go to “WivOrgStackSet” under “Actions” click on “Add stacks to Stackset”