Salesforce Integration Onboarding
This guide explains how to create a Salesforce External Client App, connect it to Wiv using OAuth, and start using Salesforce steps inside Wiv workflows.What you will set up
- Create a Salesforce External Client App named Wiv
- Configure OAuth (callback URL, scopes, flow, and security)
- (Recommended) Restrict who can authorize the app
- Copy Consumer Key and Consumer Secret
- Create the integration in Wiv
- Use Salesforce steps in Wiv workflows (Get, Create, etc.)
Prerequisites
- Salesforce Admin access (or permissions to create/manage External Client Apps)
- A Salesforce user to authorize the integration
Part A - Salesforce setup (External Client App)
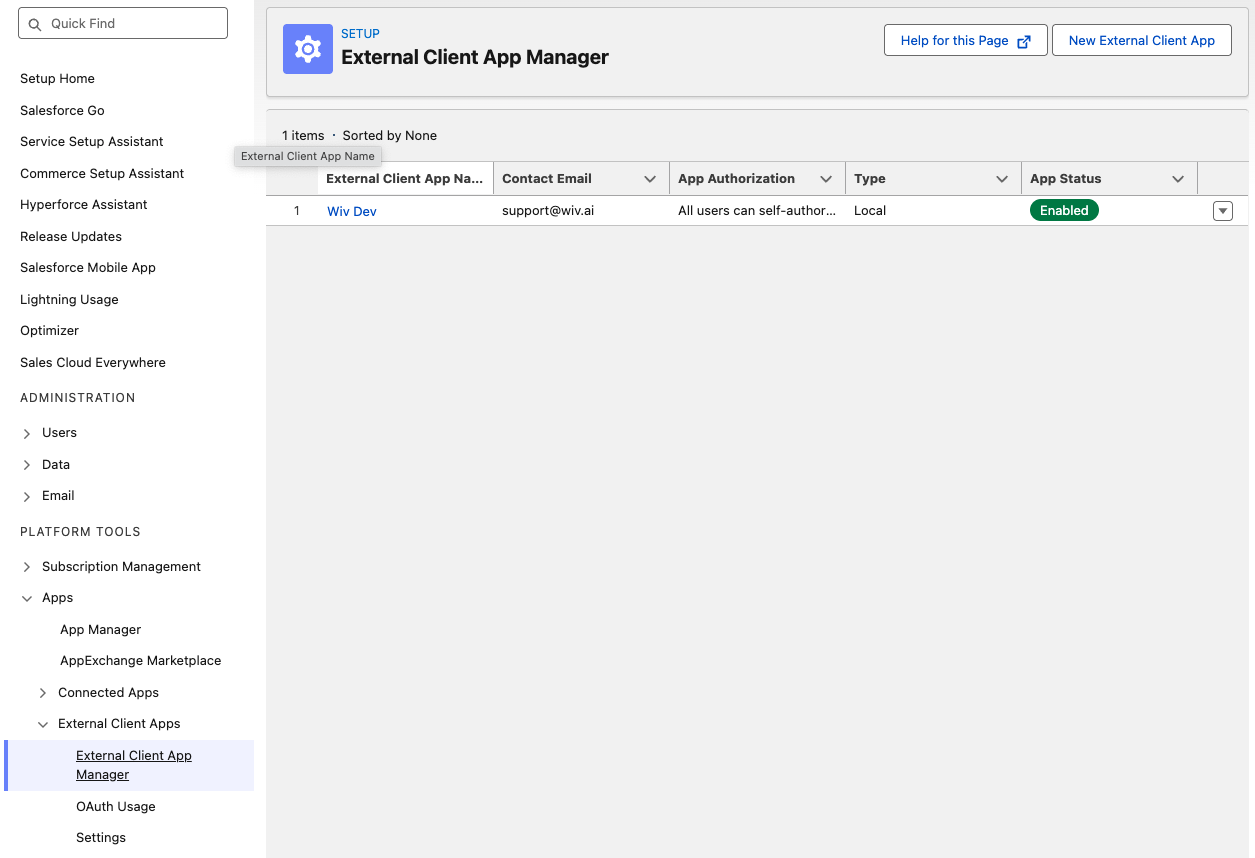
Step 1: Open External Client App Manager
- In Salesforce, go to Setup
- Search for External Client App Manager
- Open External Client App Manager
- Click New External Client App
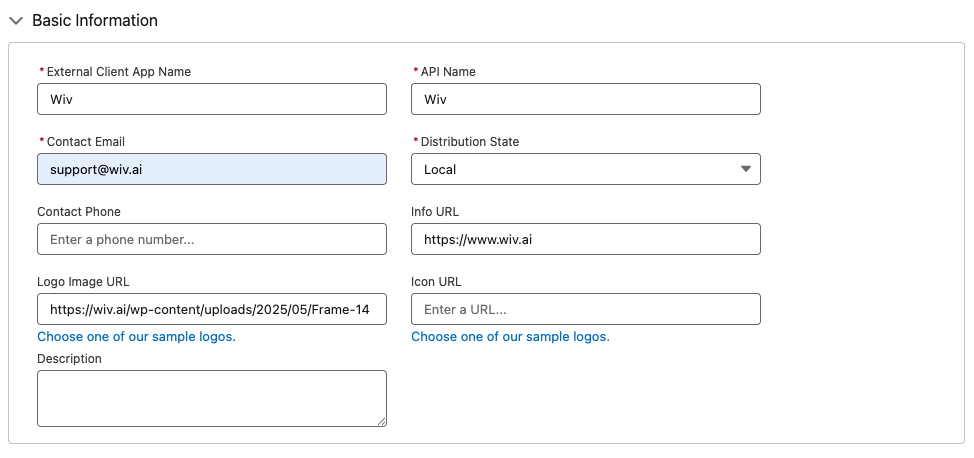
Step 2: Fill Basic Information
In Basic Information, set:-
External Client App Name:
Wiv -
API Name:
Wiv(or let Salesforce auto-fill) -
Contact Email:
support@wiv.ai -
Distribution State:
Local -
Info URL:
https://www.wiv.ai -
Logo Image URL:
https://wiv.ai/wp-content/uploads/2025/05/Frame-1410192134.svg
“Wiv integration for Salesforce via OAuth.”
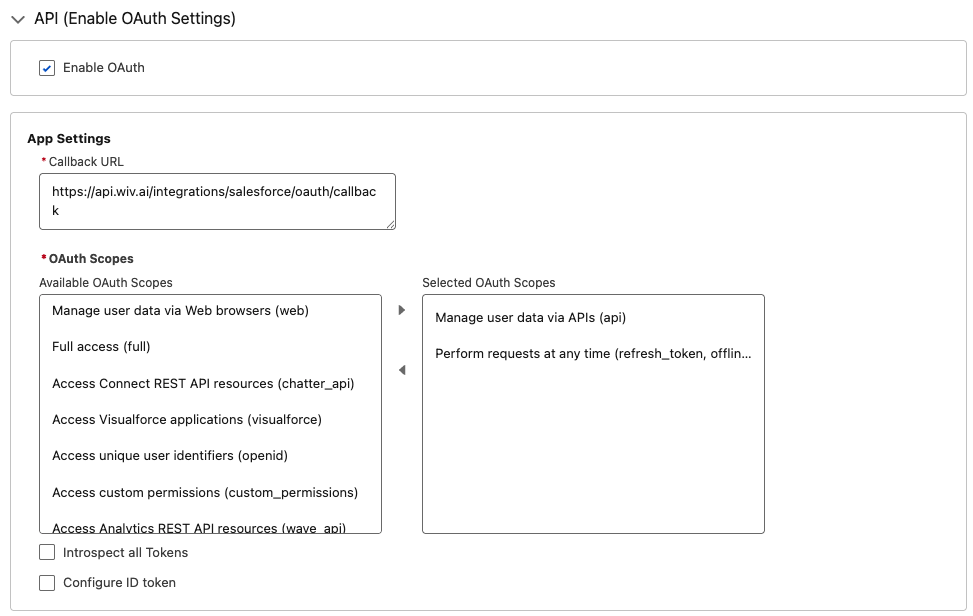
Step 3: Enable OAuth and configure it
Expand API (Enable OAuth Settings) and configure:3.1 Enable OAuth
- Check Enable OAuth
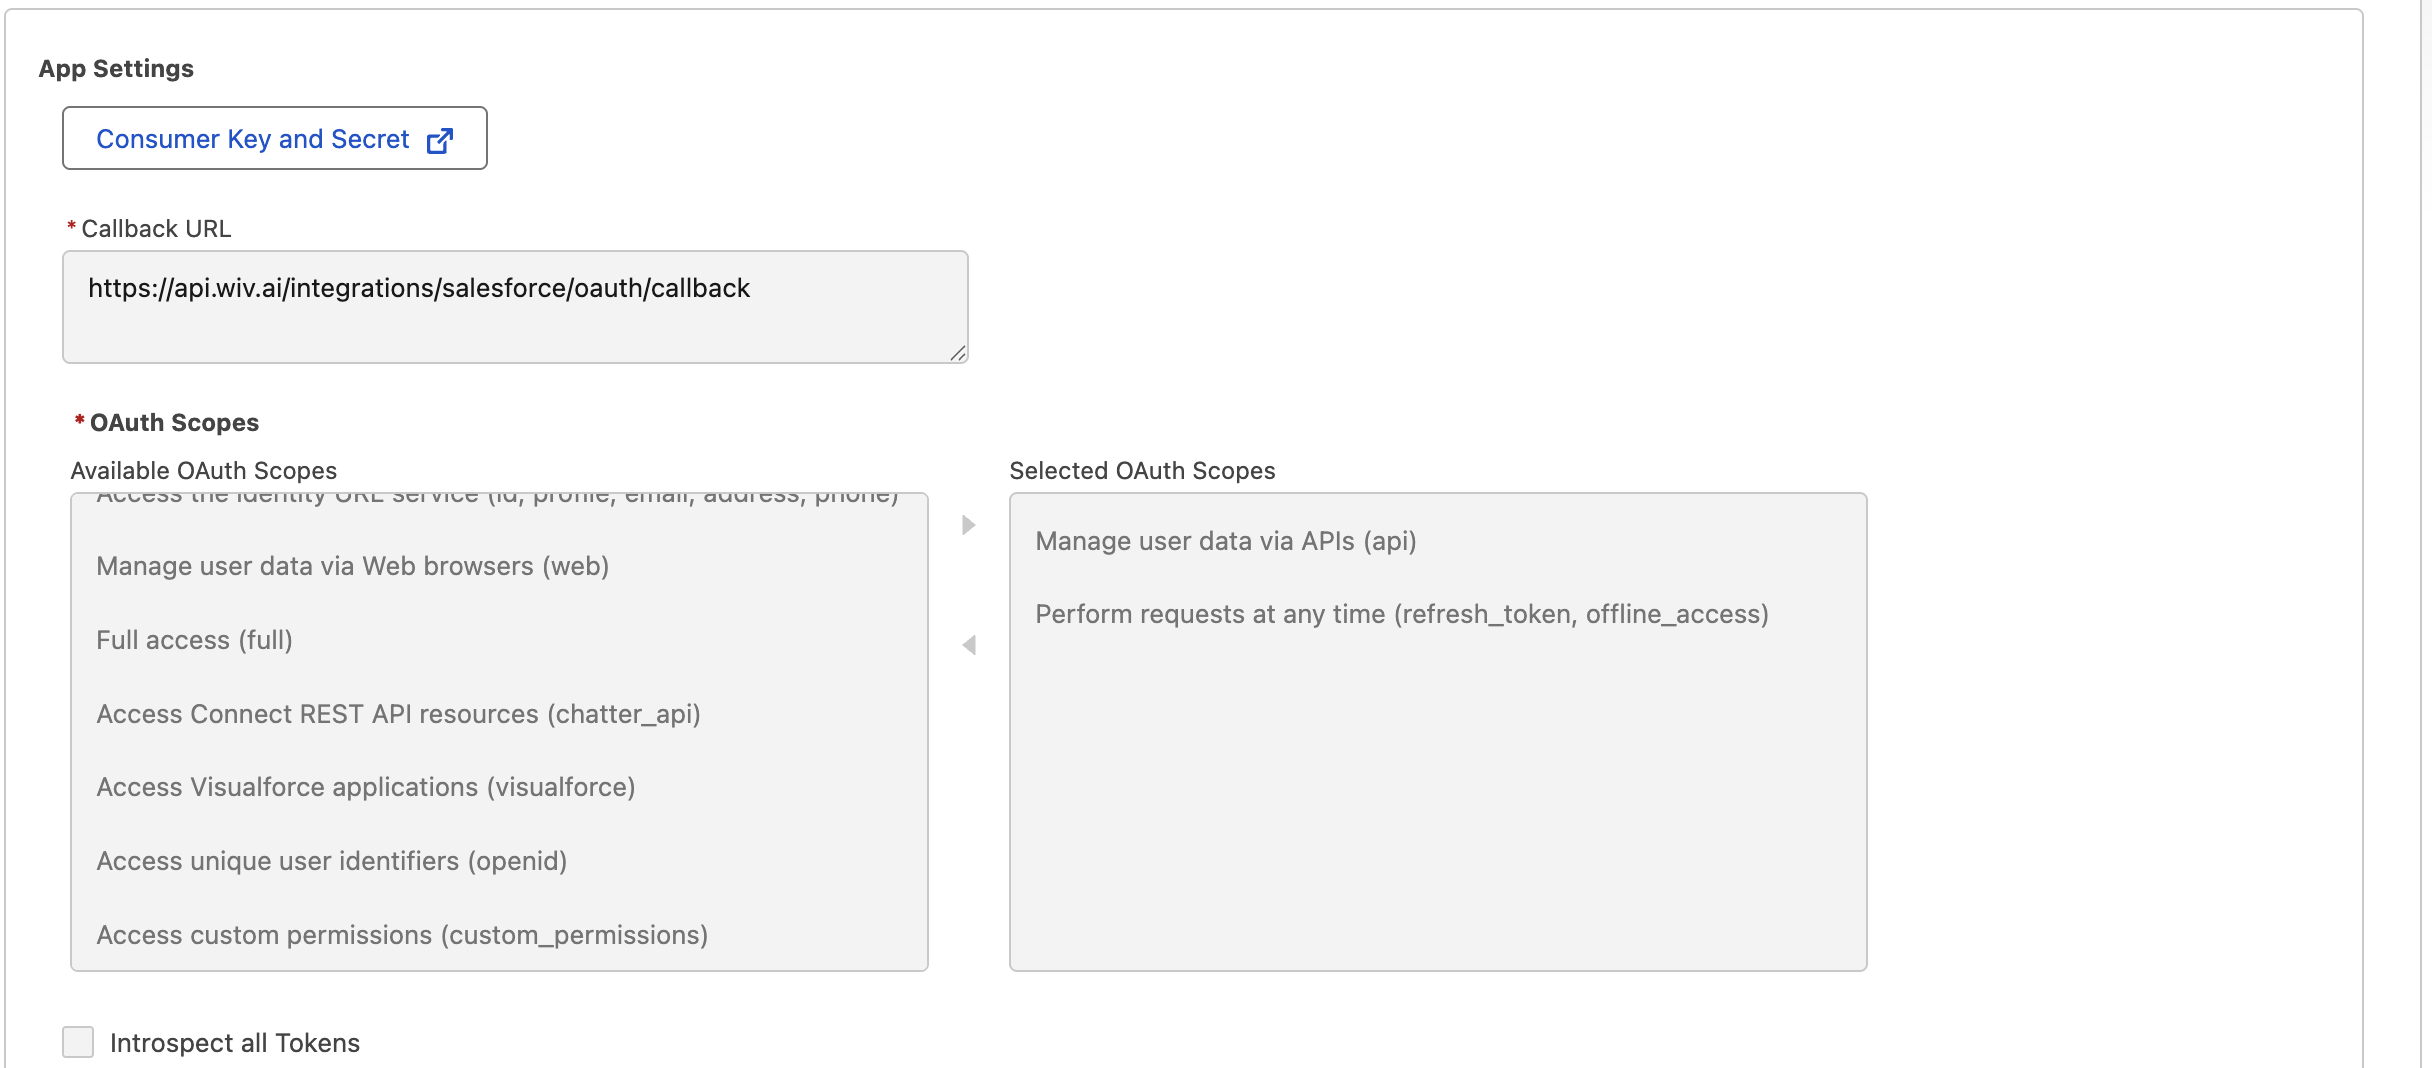
3.2 Callback URL
Set Callback URL to:https://api.wiv.ai/integrations/salesforce/oauth/callback
3.3 OAuth Scopes
Move the following to Selected OAuth Scopes:- Manage user data via APIs (api)
- Perform requests at any time (refresh_token, offline_access)
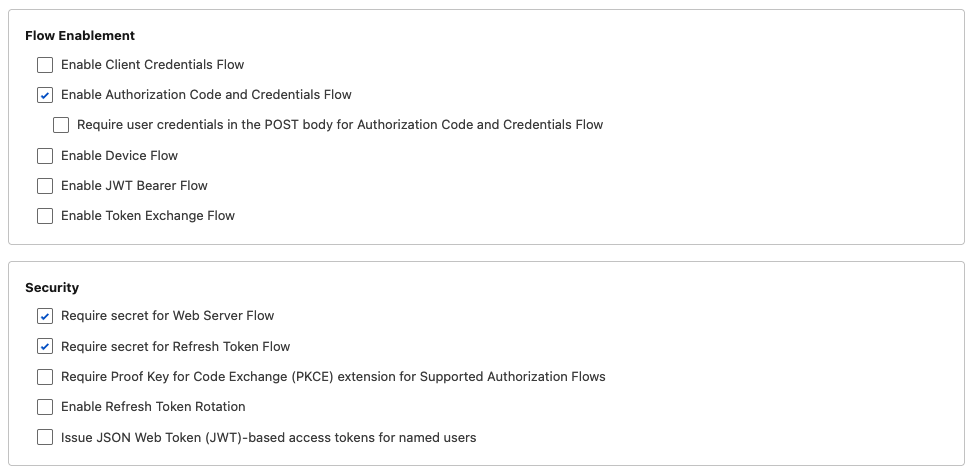
Step 4: Configure OAuth flow and security
4.1 Flow Enablement
Enable:- Authorization Code and Credentials Flow
4.2 Security
Enable:- Require secret for Web Server Flow
- Require secret for Refresh Token Flow
Step 5: Confirm the app is Enabled
- Return to External Client App Manager
- Open your app (Wiv)
- Confirm App Status is Enabled
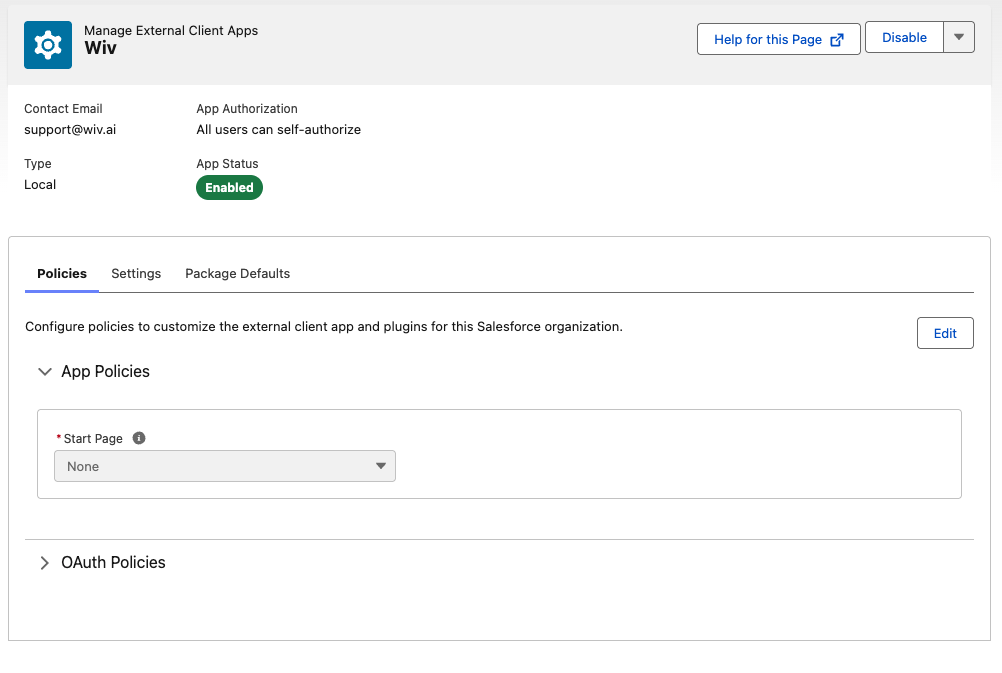
Optional: Restrict who can authorize the app
For production orgs, it is typically safer to restrict who can authorize/use the integration instead of allowing “All users can self-authorize”.Step 5.1: Set “Admin approved users are pre-authorized”
- In Salesforce Setup, go to External Client App Manager
- Open Wiv
- Go to the Policies tab
- Click Edit
- In OAuth Policies, set Permitted Users to:
- Admin approved users are pre-authorized
- Click Save
- Under Select Permission Sets, choose the permission set intended for the integration user (example: a permission set named “Integration User” in your org)
- Move it to Selected Permission Sets
- Save
- Go to Setup -> Users -> Users
- Open the integration user
- Under Permission Set Assignments, add the permission set you selected
- Save
- Use Profiles only if you intentionally want all users in that profile to be allowed.
- If you set “Admin approved users are pre-authorized” but do not select any Profile/Permission Set, nobody will be able to authorize the app.
Step 6: Where to find the Consumer Key and Consumer Secret
After saving the app, Salesforce generates OAuth credentials for it.- In Salesforce, go to Setup
- Search for External Client App Manager
- Open External Client App Manager
- Click the app Wiv
- Open the Settings tab (sometimes named Settings or App Settings depending on Salesforce UI)
- In the OAuth/API section, copy:
- Consumer Key
- Consumer Secret
- The Consumer Secret may be hidden. Click Reveal (or similar) to show it.
- If you regenerate/rotate the Consumer Secret later, you must update it in Wiv.
Part B - Recommended: Use a dedicated Wiv user
Wiv’s permissions are determined by the Salesforce user who authorizes the OAuth connection. Using a dedicated Wiv user is safer and prevents outages.Why it is recommended
- Security: you can enforce least privilege (read-only, or limited write)
- Stability: the integration does not break when an employee leaves or changes roles
- Auditability: actions are clearly attributed to the integration user
How to set it up
- Create a dedicated Salesforce user:
- Setup -> Users -> Users -> New User
-
Name example:
Wiv Integration - Use a controlled mailbox/username
- Choose a minimal profile that supports API access
- Grant access using Permission Sets (preferred):
-
Create a permission set:
Wiv
-
Configure:
Required objects (Create + Read)
- Case: Read + Create
- Opportunity: Read + Create
- Lead: Read + Create
-
Avoid unless you explicitly need updates/deletes from Wiv:
- Edit
- Delete
Required related objects (Read only)
In most Salesforce orgs, these are needed to set relationships or lookups when creating records:- Account: Read (commonly needed for Opportunity, often for Case)
- Contact: Read (commonly needed for Case, optional for Opportunity)
- User: Read (needed if setting record owner to a user)
- RecordType: Read (needed if selecting Record Type in Wiv)
-
Optional, only if you assign ownership to queues:
- Group / Queue: Read
Field Level Security Requirements (FLS)
Object permissions are not enough. Field Level Security must allow Wiv to write the fields it sets.6.1 Case - Fields (Edit access required)
Grant Edit access to all fields Wiv may set, including required fields in your org. Typical minimum:-
Subject -
Status -
Origin -
Description(optional) -
RecordTypeId(if record types are used) -
AccountId(if linking to account) -
ContactId(if linking to contact) -
OwnerId(if assigning owner) - Any required custom fields (org-specific)
6.2 Lead - Fields (Edit access required)
Typical minimum (depends on org configuration):-
LastName(commonly required) -
Company(commonly required) -
Email(optional) -
Phone(optional) -
Status(often required) -
RecordTypeId(if used) - Any required custom fields (org-specific)
6.3 Opportunity - Fields (Edit access required)
Typical minimum:-
Name -
StageName -
CloseDate -
Amount(optional) -
AccountId(commonly required) -
RecordTypeId(if used) -
OwnerId(if assigning owner) - Any required custom fields (org-specific)
6.4 Read access (recommended)
Grant Read access to:- the record Id fields returned after creation
- fields you want to use later in workflows (for example: CaseNumber, Opportunity Name)
- Assign the permission set(s) to the integration user:
- Open the user -> Permission Set Assignments -> add the permission set(s)
- Authorize Wiv using this user:
- When Wiv redirects to Salesforce for authorization, log in as the dedicated integration user
Part C - Create the integration in Wiv
Step 7: Create the Salesforce integration in Wiv
- In Wiv, go to Integrations
- Select Salesforce
- Click New Integration
- Fill:
-
Integration Name:
Salesforce Prod - Consumer Key: paste from Salesforce
- Consumer Secret: paste from Salesforce
- Click Add to App
- You will be redirected to Salesforce to authorize
- Log in as the Salesforce user you want Wiv to operate as (recommended: the dedicated integration user)
- Approve access

Part D - Use Salesforce in Wiv workflows
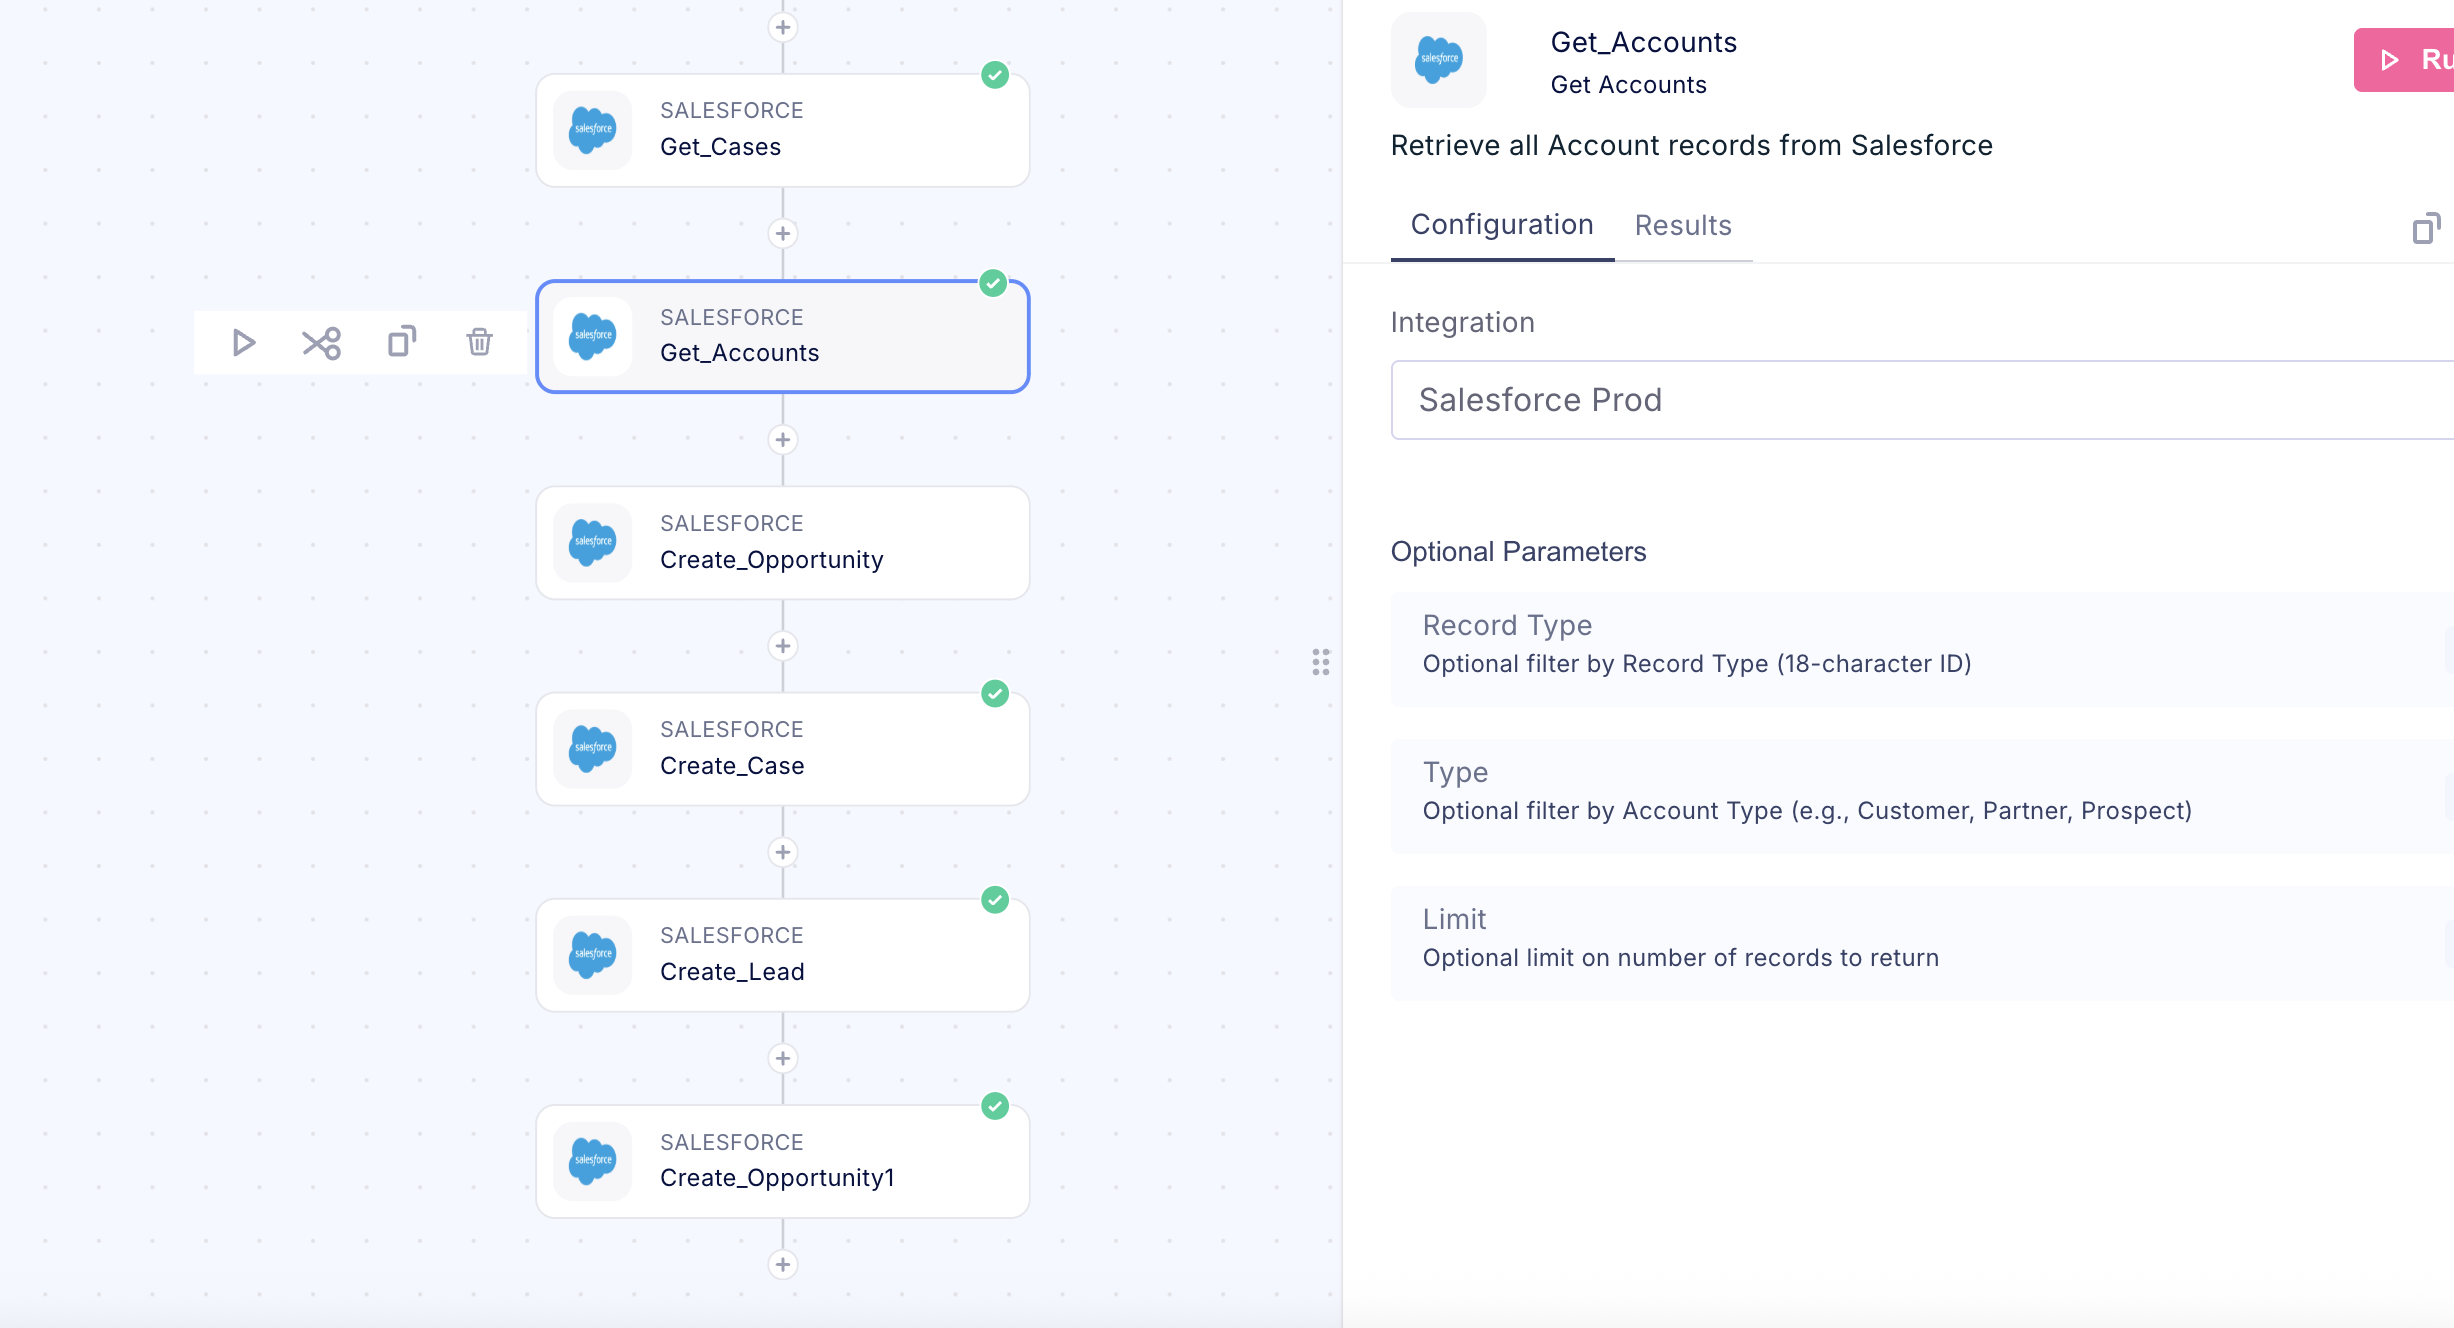
Step 8: Add a Salesforce step
- Open a workflow in Wiv
- Click + to add a step
- Choose Salesforce
- Select an action, for example:
- Get Accounts
- Get Cases
- Create Lead
- Create Case
- Create Opportunity
Troubleshooting
Redirect URI mismatch
- Callback URL must match exactly:
https://api.wiv.ai/integrations/salesforce/oauth/callback
Invalid client / bad credentials
- Re-check Consumer Key and Consumer Secret
- Confirm the app is Enabled
Insufficient scope
-
Confirm scopes include:
-
api -
refresh_token, offline_access
-
Picklist / Status / Origin validation errors
- Often caused by wrong/missing Record Type
- Select Record Type first and retry
Integration stops working later
Common causes:- The Salesforce user was deactivated/locked
- App policy changed to admin-approved but Profiles/Permission Sets were not approved
- Consumer Secret was rotated in Salesforce and not updated in Wiv
What to send to Wiv Support (if needed)
Include:- Salesforce org type (Production or Sandbox)
- Screenshot of OAuth scopes + callback URL
-
The integration name in Wiv (example:
Salesforce Prod) - The exact error message from Wiv step run