- Flow Controls
- Actions
Flow Control Steps
Flow Control elements manage workflow progression. Every workflow starts with the “Entry” step, and controlled by the following components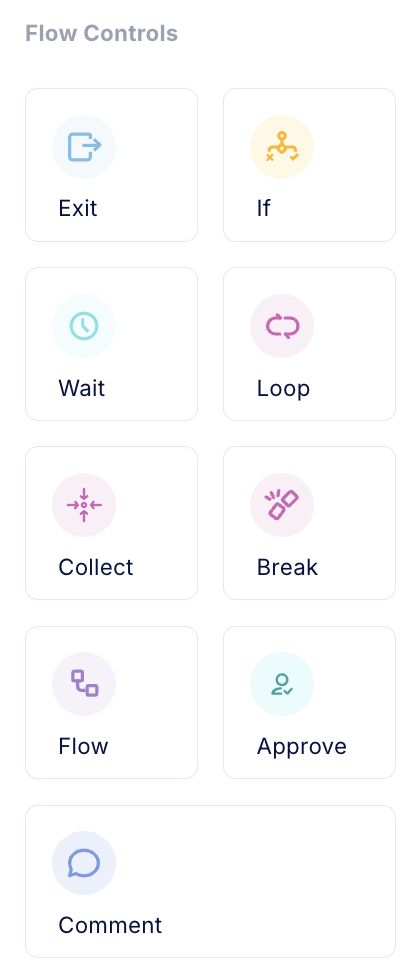
- Exit: Concludes the entire workflow execution, and can return execution values
- If: Enables conditional branching based on specified criteria
- Wait: Introduces a timed pause in execution
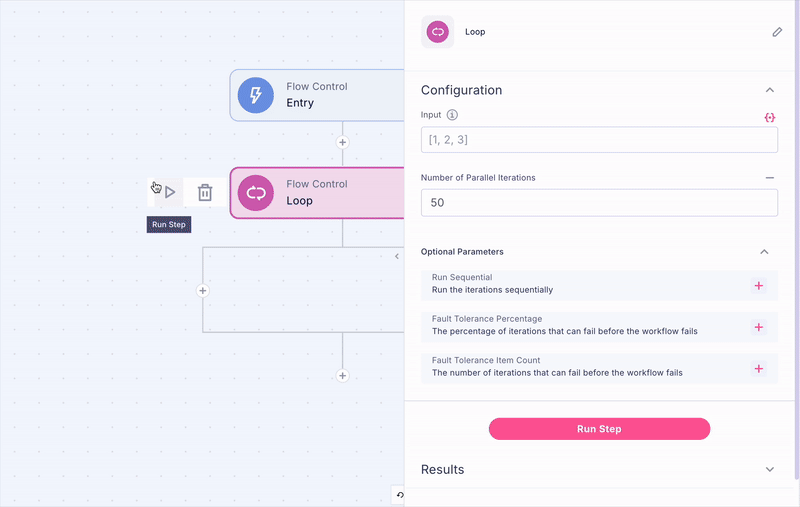
- Loop: Executes a sequence of steps repeatedly
- Flow: Incorporates a separate workflow as a component
- Approve: Implement a powerful feedback loop
- **Comment: **Apply comments to explain workflows assumptions and functionality
Action Steps
Action steps execute specific actions within the workflow. We support multiple action steps in multiple areas, like cloud commands, notifications, ticketing, and utilities.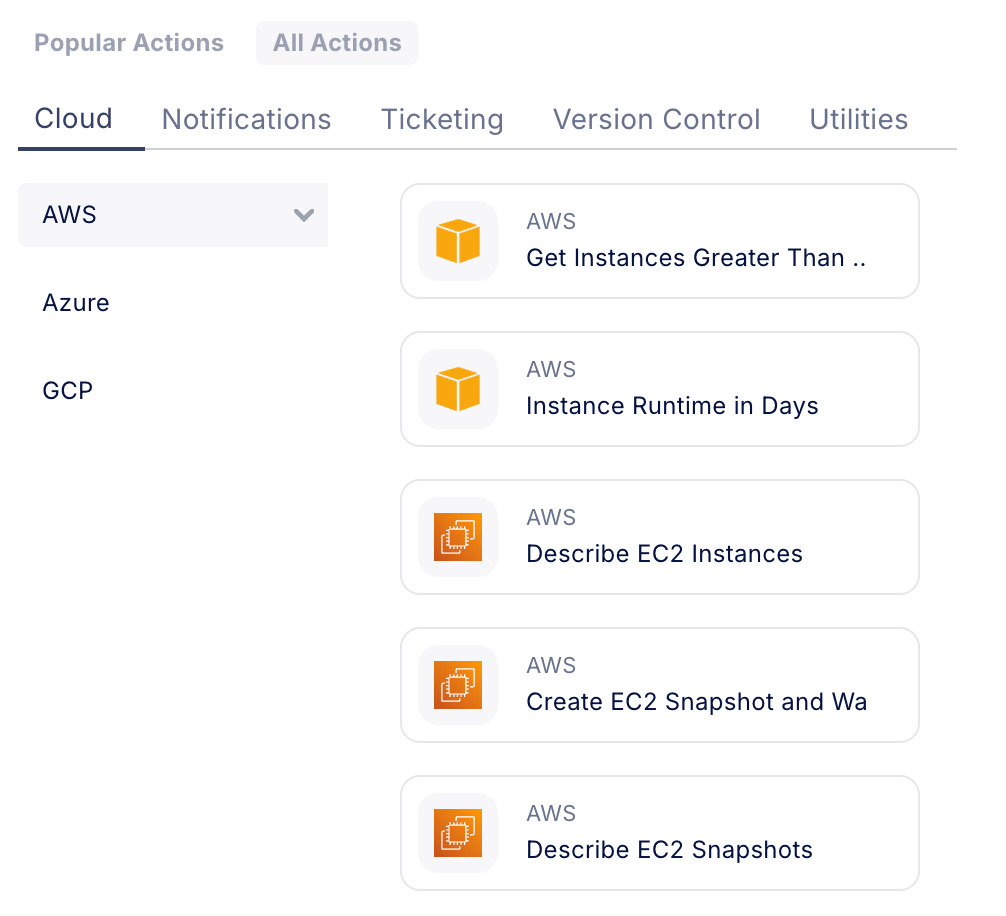
Action Step Configuration
Action steps operate on workflow data, with the ability to receive data from previous steps, generate new data, and process existing information. While many action steps perform straightforward operations, we’ve developed enhanced functionality through “Combo steps.”Combo Steps
Combo steps are designed to simplify complex operations by:- Consolidating data collection from multiple sources
- Pre-processing data to streamline user interactions
- Providing integrated functionality that reduces the need for multiple individual steps
How to Add a new Step to the Workflow
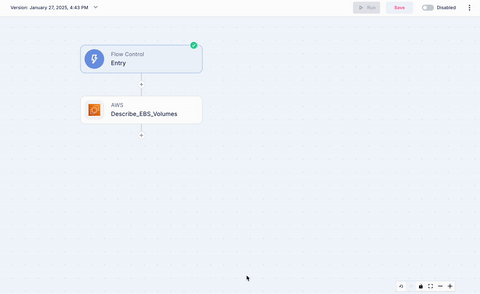
You can add a step by clicking on the plus icon. When you click on the plus icon, you can add flow control steps, the most common steps, or brows all the steps- Click on the plus icon within the workflow area.
- Choose either flow control or action steps
- Select the desired step, and it will be added to the workflow
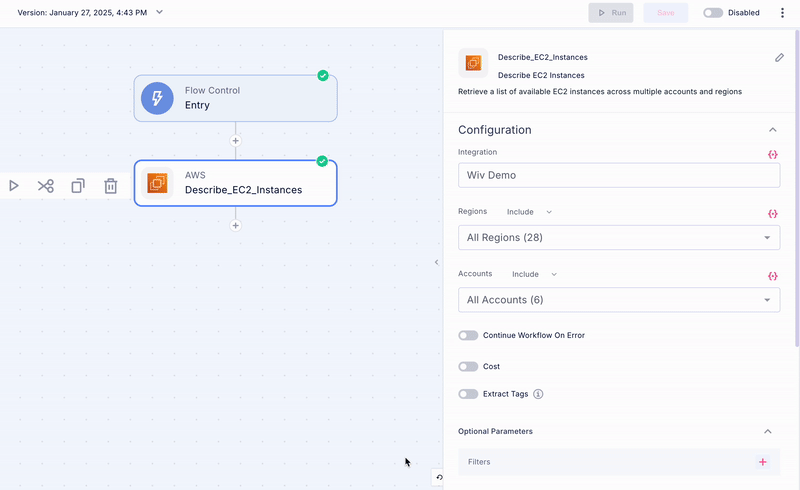
Step Parameters
- Name: Each step has a unique name that is also used for the step ID; you can edit it. Avoid using special characters when naming your steps
- Parameters: Fill in specific parameters (e.g. the relevant integration, filters, messages, code, etc.).
- Workflow Data: Whenever is needed, you can use the parameters icon (or use the “Command+Click” on MacOs, or “Control+Click” on Windows) to insert data from a previously executed step
Testing a Step
- Click on the Setup Testing tab
- Fill in all the required parameters.
- Press on Setup Testing to initiate testing.
- Review the output to validate functionality and gather reference data for subsequent steps
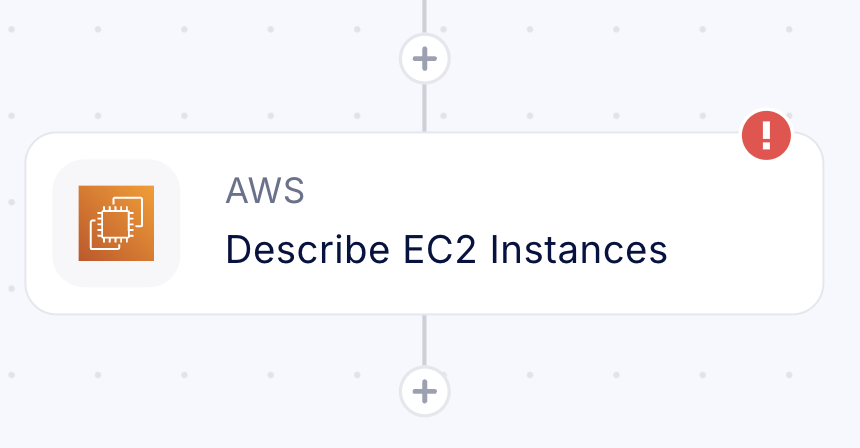
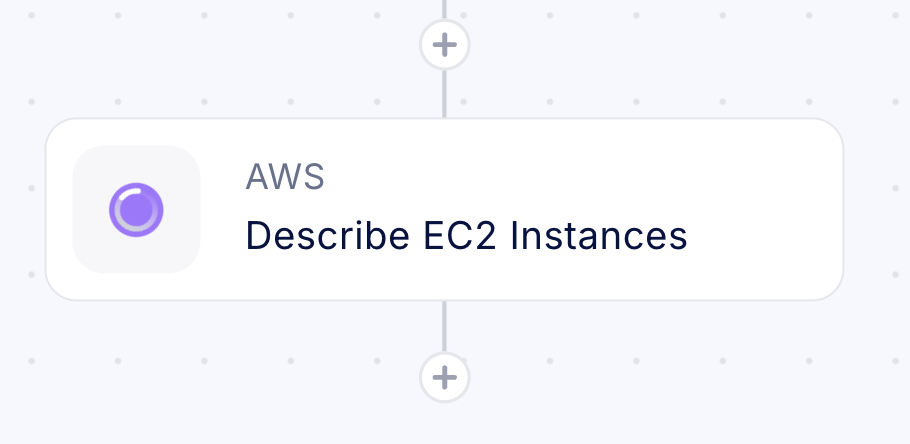
Step Statuses
This section outlines Wiv’s step status system and its associated best practices. Mastering these concepts enables you to build reliable, efficient workflows that align with operational requirements.- Initial State - The step appears without any status indicators upon initial addition to the workflow

- Configuration Required - Indicates mandatory parameters or integration settings need to be defined before the step can be executed.
- Test Running - Status that indicates that the step is currently running
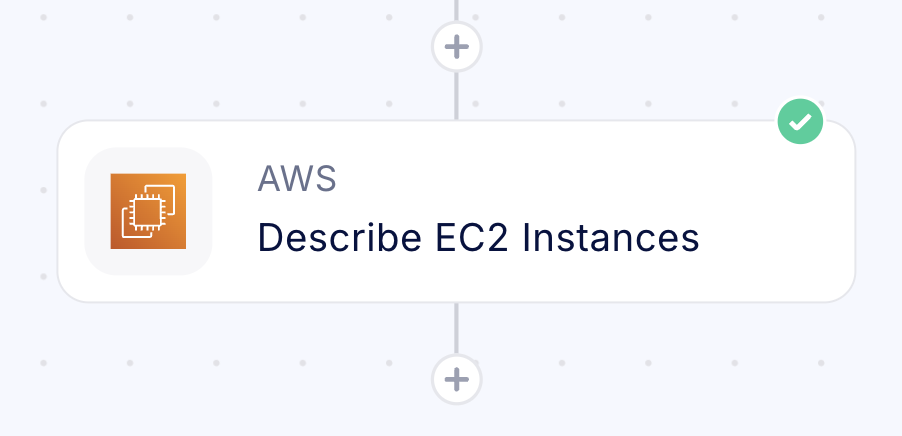
- Test Success - Confirms successful configuration and testing completion with validated results
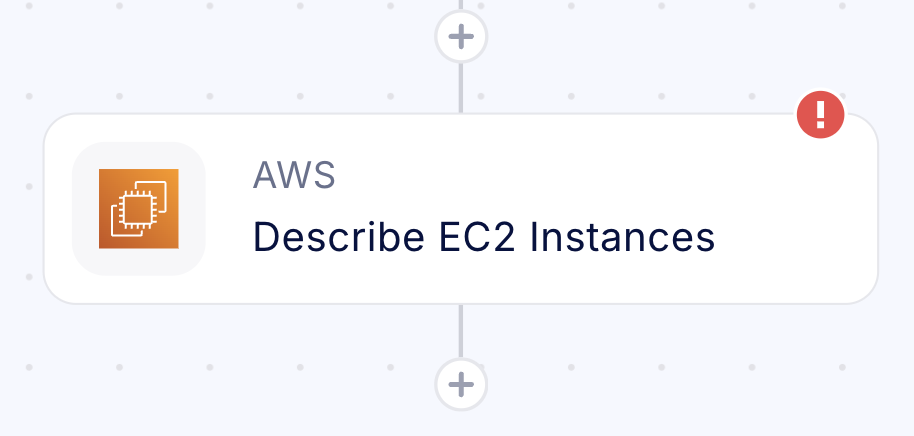
- Test Failure - Indicates unsuccessful test execution, requiring configuration review and adjustment
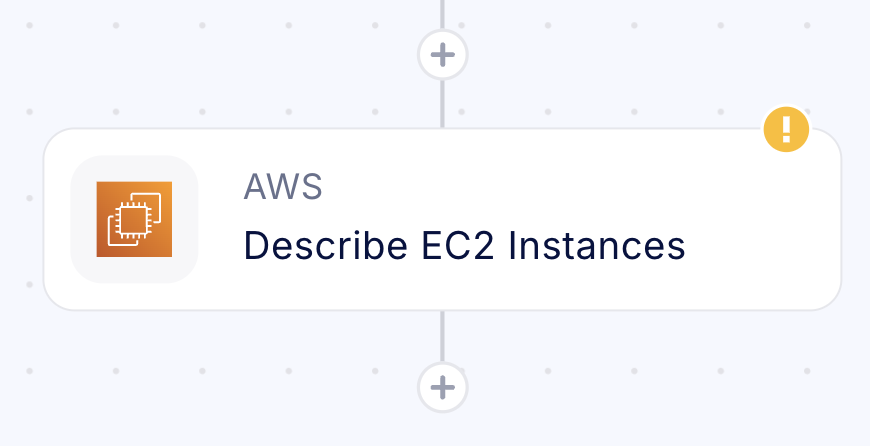
- Outdated Configuration - Signals that previous test results may no longer be valid due to configuration changes, suggesting retesting is necessary
Best Practices
- Testing individual steps serves two critical functions: it validates expected outcomes and simplifies parameter configuration through the tree helper for subsequent steps. This validation approach ensures workflow reliability and streamlines development.
- Keep track of each step’s current status to ensure accurate testing and data processing. Working with outdated steps may lead to inconsistencies in results and configurations, potentially affecting your workflow’s reliability.